Accessing and Configuring Workflow Properties in Cflow
To define how a workflow behaves and displays in Cflow, follow these steps to access the Workflow Properties and Controls settings.
Step-by-Step Navigation
- Open or edit a workflow in Cflow.
- At the top of the workflow screen, click on the tab labeled “Advanced.”
- On the left-hand panel, under the “Advanced” tab, click on “Workflow Properties.”
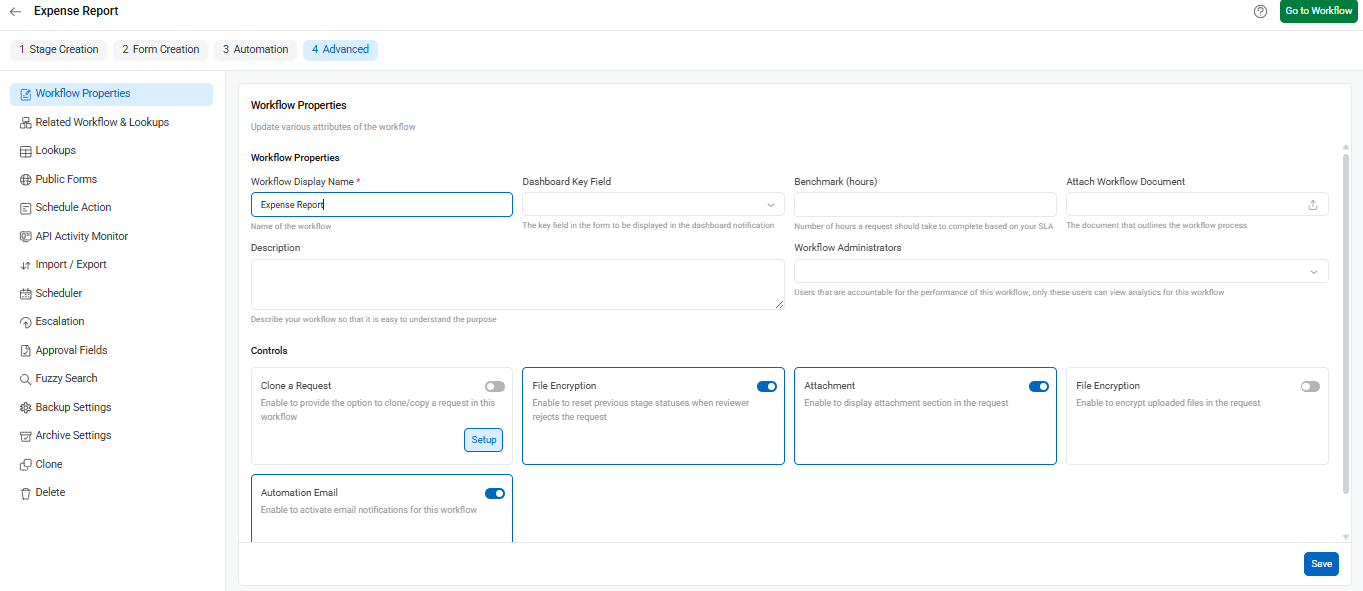
1) Workflow Properties
Once clicked, the main area displays the following fields:
Workflow Display Name – This field allows users to name the workflow. The name will be displayed throughout the Cflow interface for identification and reference.
Dashboard Key Field – This field is used to define which data element from the workflow should be shown on the dashboard. It helps highlight key information at a glance.
Benchmark (Hours) – This field sets the expected time (in hours) to complete the workflow, which may be used to track process performance.
Description – This allows users to enter contextual details about the workflow, such as its purpose or usage instructions.
Workflow Administrators – This property enables assigning responsible users who will manage the workflow’s execution and configurations.
2) Controls
Scroll down within the same panel to find the Controls section, which includes toggle options like:
Clone a Request – Enables users to create a copy of a request. This is useful when a similar process needs to be repeated with minimal changes.
File Encryption – Allows encryption of uploaded files to ensure the security and confidentiality of attached documents.
Attachment – Displays an attachment section in the request, allowing users to upload supporting documents.
Automation Email – Enables sending automatic email notifications related to the workflow’s progress or actions.