Designing forms in Cflow is simple and intuitive. The interface allows you to structure your form with sections, individual fields, and even tables for complex data input.
Access Form Creation
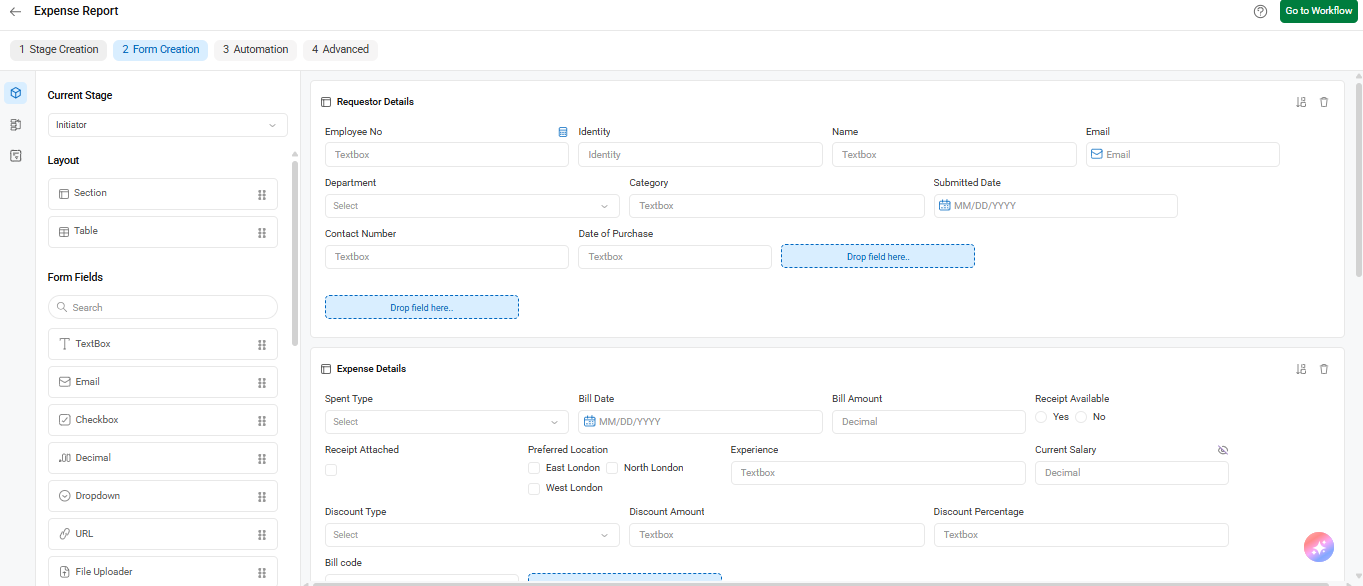
Click on the “Form Creation” tab in the top navigation bar of your workflow setup. You will see a drag-and-drop form builder on the left and the canvas on the right.
Add Form Fields
Fields such as Textbox, Email, Checkbox, Dropdown, and Decimal are available in the Form Fields toolbox on the left.
To add a field:
Drag and drop the desired field into a section in your form (e.g., Requestor Details or Expense Details).
Click on the dropped field to edit attributes like placeholder text, default values, or field behavior.
Create and Manage Sections
To organize your form: Use the “Section” layout element from the Layout panel to create separate groups like Requestor Details or Expense Details.
Once added, you can place fields within these sections for clarity and logic.
Insert a Table
To allow users to input multiple rows of data (e.g., expenses or line items):
- Drag the “Table” layout element into your form.
- You can then drag fields like dropdowns or textboxes into the table columns.
These are helpful when importing data (like line items) from Excel during request submission.
Rearranging and Customizing
You can drag fields to reposition them across the form. Customize each field using the settings panel (by clicking the field), including validation rules and visibility.