Cflow’s Rules Engine lets you automate request routing based on specific conditions. You can create rules that determine how and when a request moves from one stage to another within your workflow. Here’s how to do it:
1. Open Automation Tab
Navigate to the workflow you want to modify, and click on the Automation tab at the top.
2. Add a New Rule
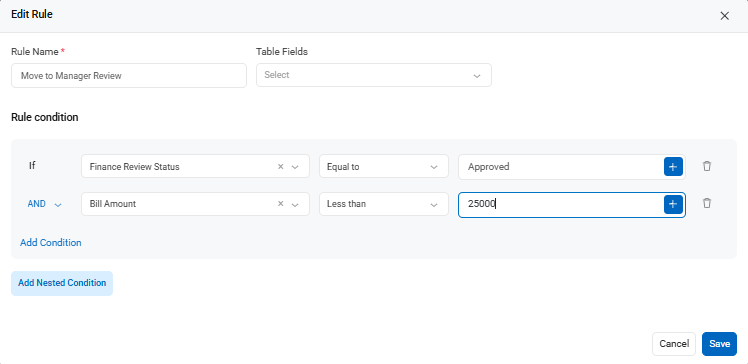
Click on “Add Rule” and provide a name. e.g., Move to Manager Review.
3. Define Rule Conditions
Set up your conditions under the Rule Condition section. You can use simple or compound logic like:
- If: Finance Review Status = Approved
- AND: Bill Amount < 25000
You can also click on “Add Condition” or “Add Nested Condition” for more complex logic.
Use of multiple conditions
You can combine multiple conditions using AND/OR logic and also create nested conditions for more advanced workflows.
4. Add a Move Action
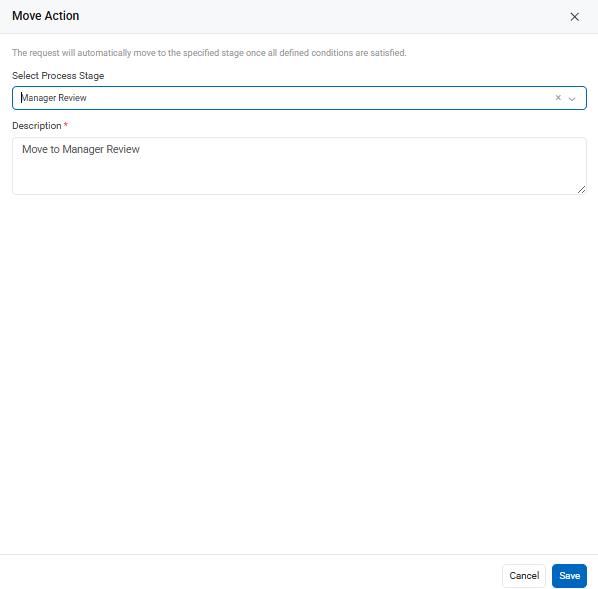
On the right-hand panel, click “Add Action” and select Move.
Choose the next process stage from the dropdown (e.g., Manager Review) and give the action a clear description like “Move to Manager Review”.
Once your conditions and action are in place, click Save to activate the rule.
Deleting a Rule or Action in Cflow
If you need to remove an automation rule or a specific action associated with a rule, follow these steps:
To delete an individual action:
- On the right-hand side under the Action section, hover over the action card (e.g., Move to Manager Review or Email to Manager Review).
- Click the trash icon next to the specific action you want to delete.
