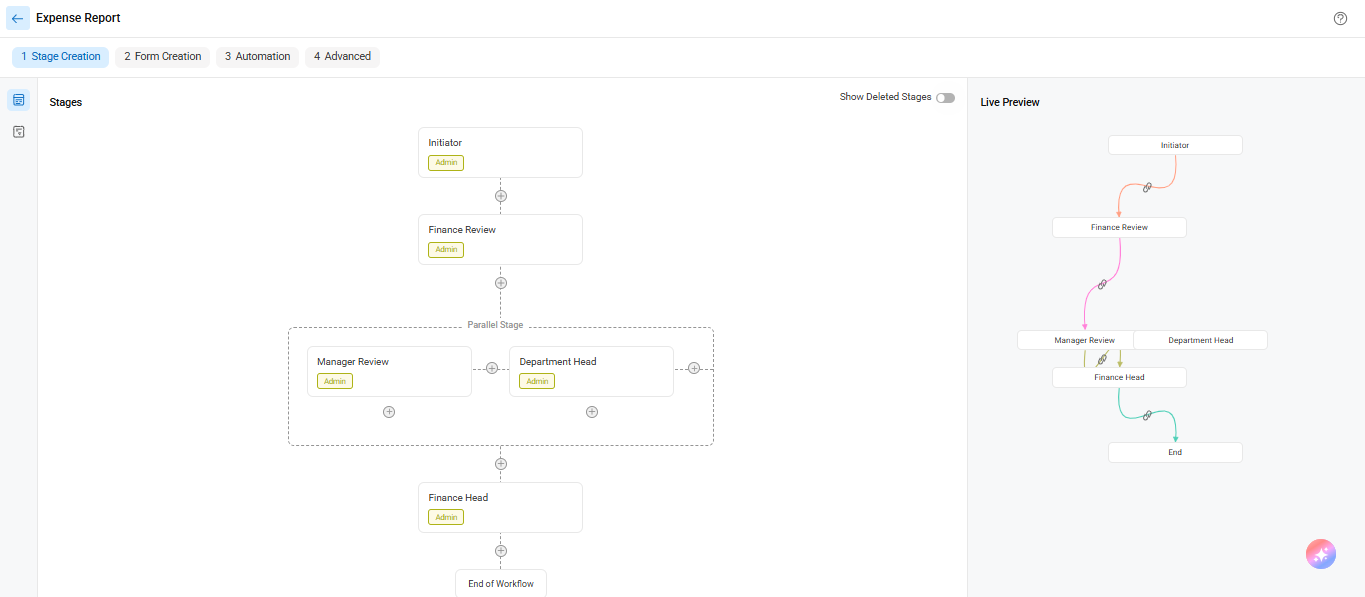
To configure stage behavior in your workflow (like reviewer roles and status values), follow these steps:
1. Open the Workflow Setup
Go to Workflow Setup → Select your workflow → Click on the “Stage” you want to configure.
2. Set the Stage Display Name
Give each stage a clear and relevant name based on the reviewer’s responsibility.
Example: If the Finance team handles the stage, name it “Finance Review”.
To edit Stage attributes, go to Workflow Setup.
Workflow Setup->Select Workflow->Click on Process Stage
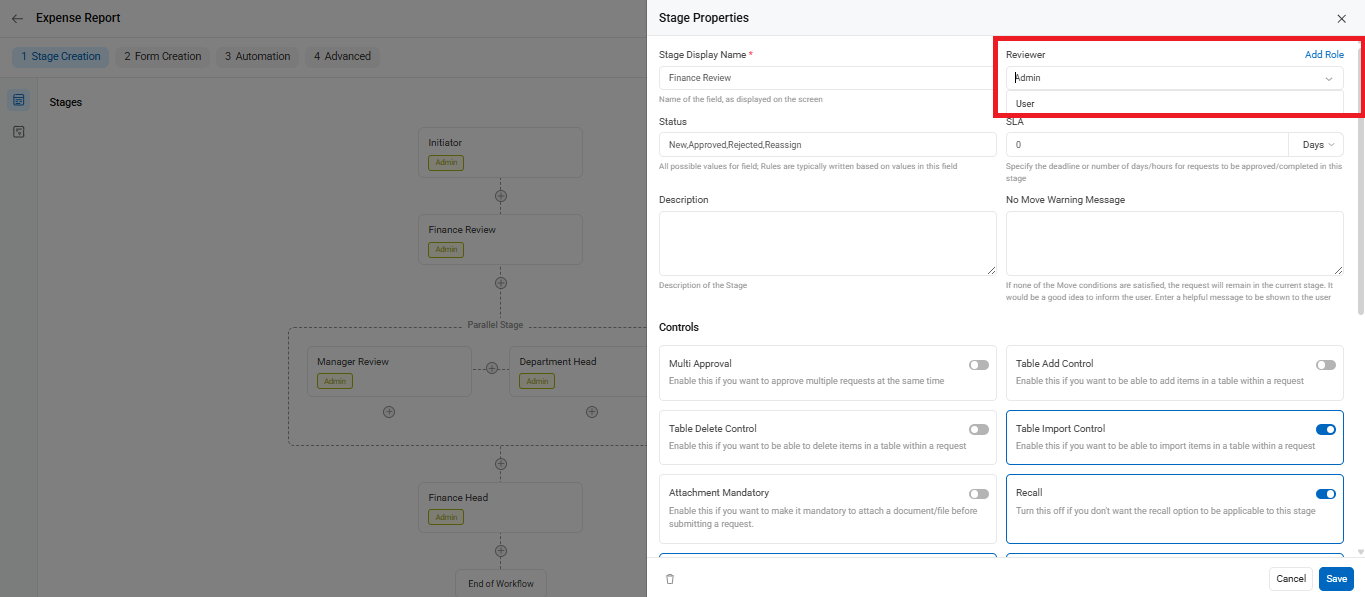
4. Assign Review Roles
Click on the “Reviewer” dropdown and choose the appropriate role (e.g., Admin, Finance, Manager).
Only users under that role will be able to take action at this stage.
You can also click Add Role if it’s not listed.
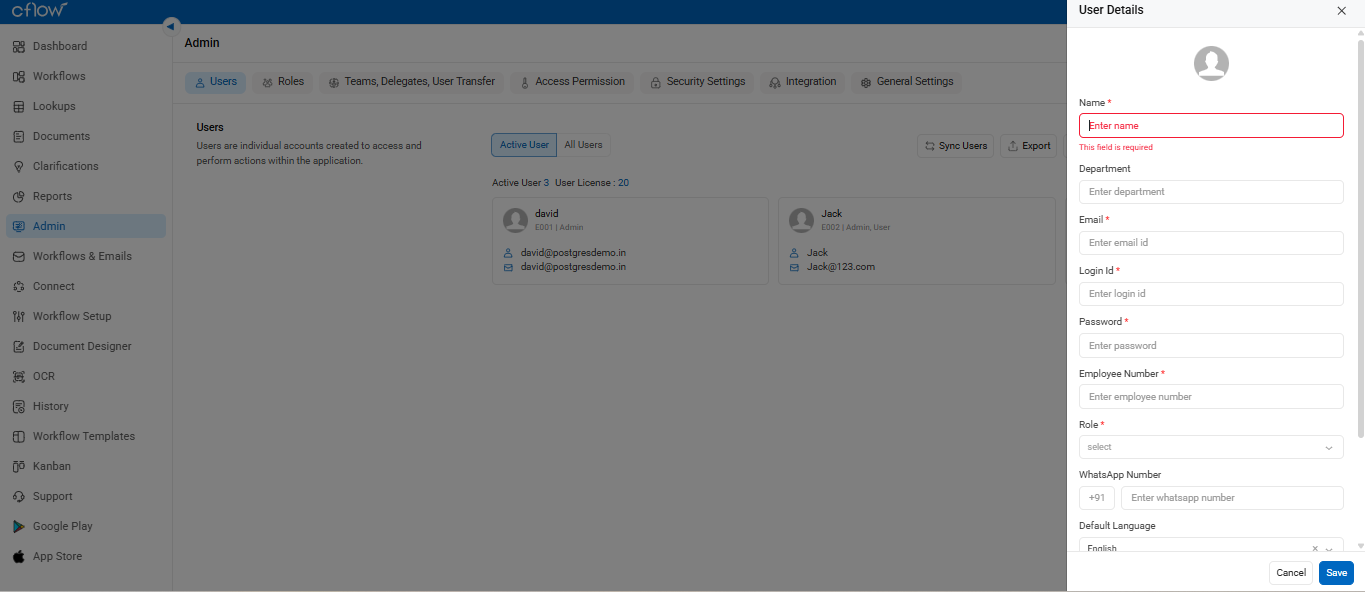
Creating a New User
- Go to Admin → Users → Add Users
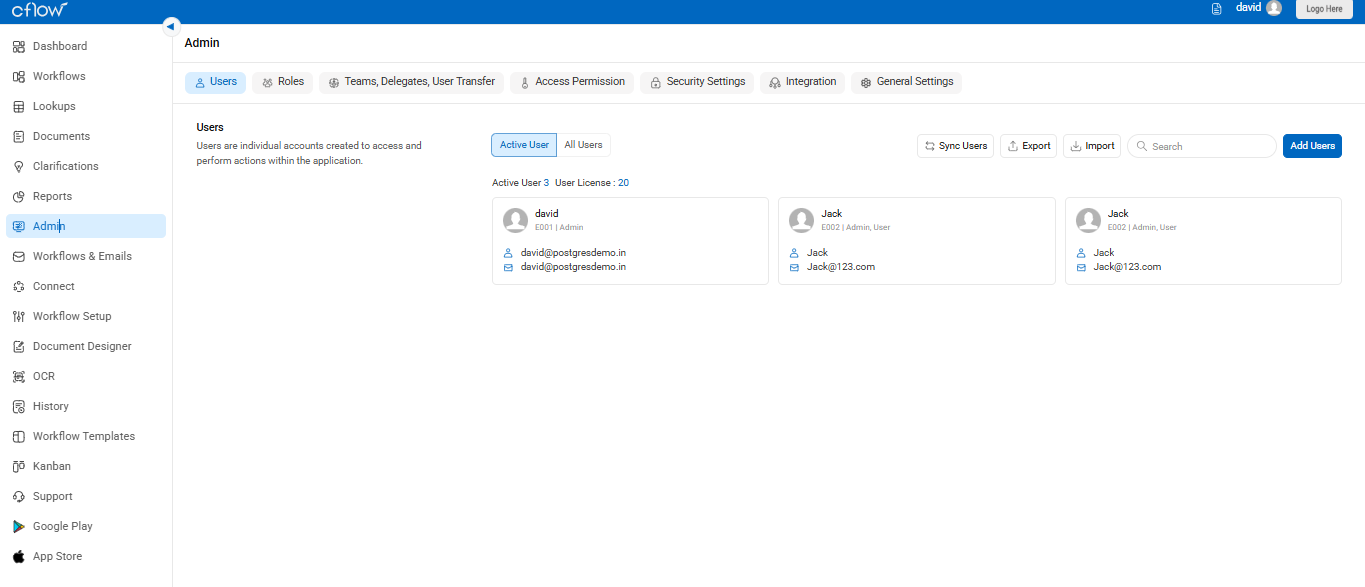
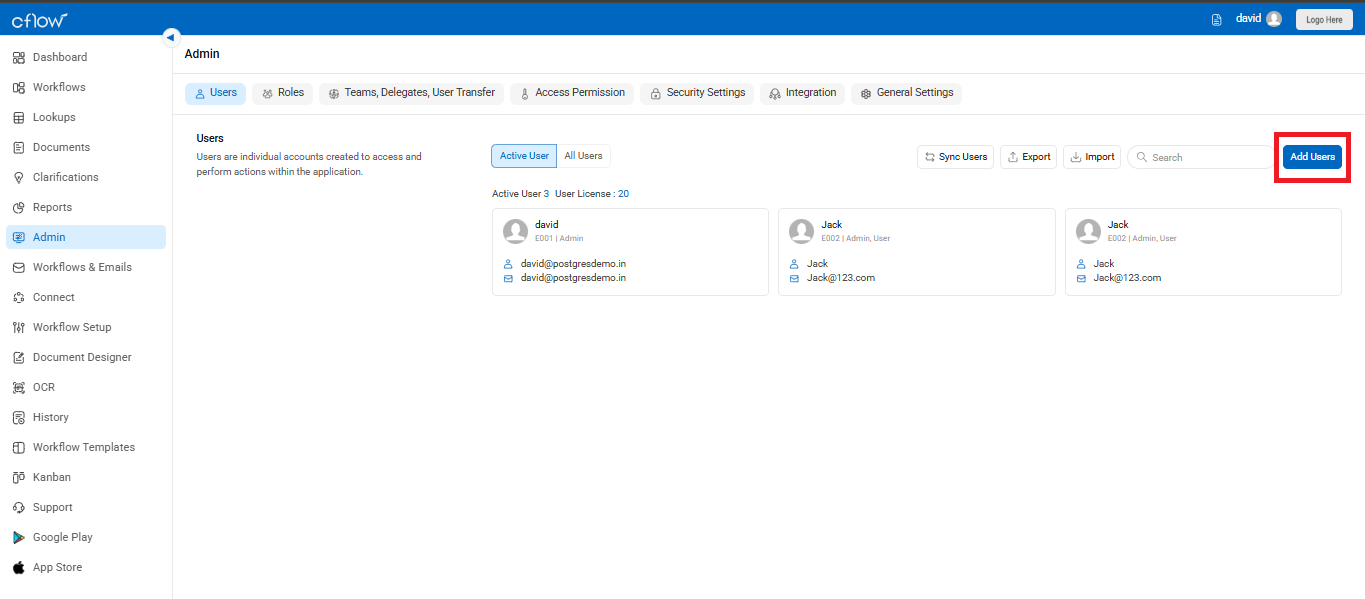
- Fill in user details (name, email, department, etc.) and assign them a Role like “Manager” or “Finance”.
- This makes them eligible to act as reviewers in the workflow.
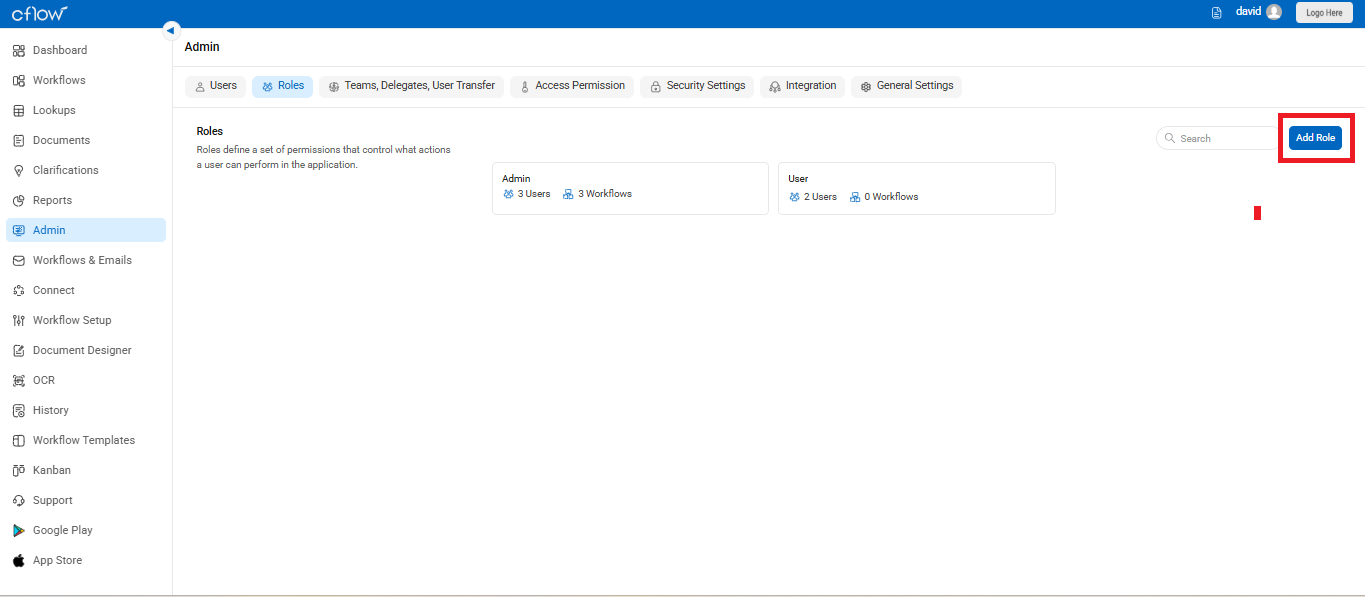
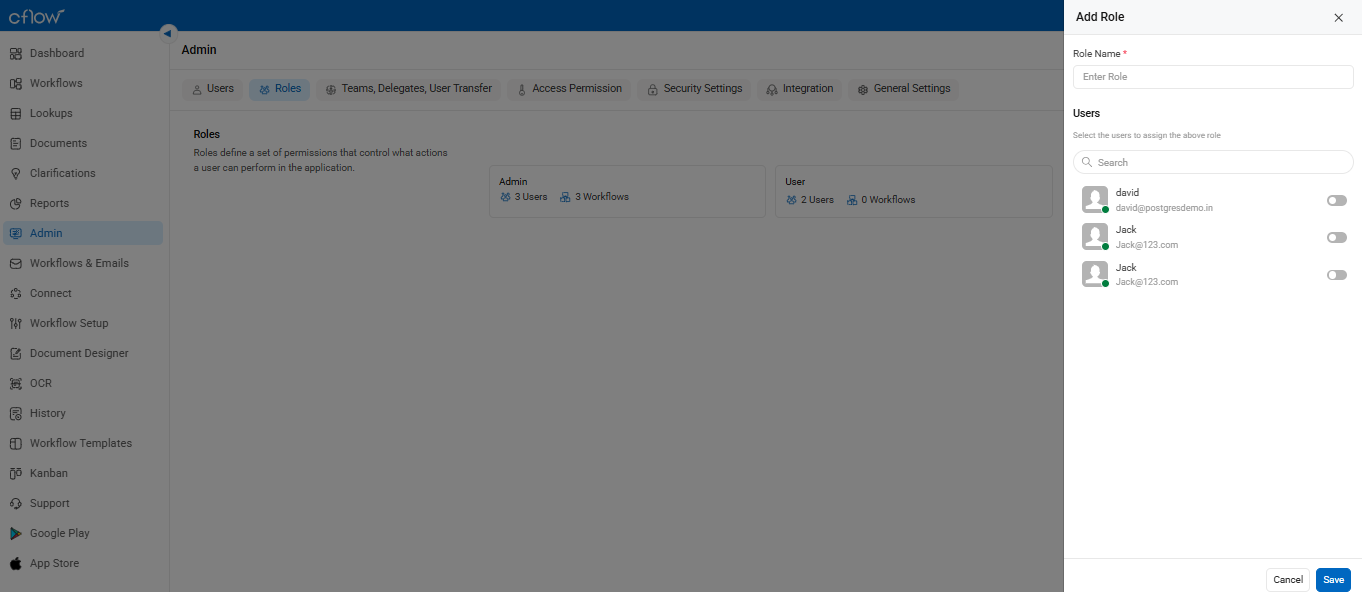
Create a New Role
- Go to Admin → Roles → Add Role
- Give the role a name and assign users to that role.
- For example: Create a “Finance” role and add all finance approvers.
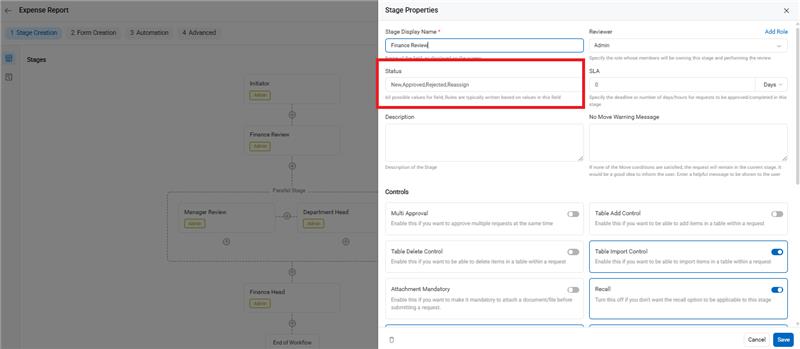
Define Status Values
Under Stage Properties, add relevant status values like:
- New, Approved, Rejected, Reassign
- You can also type custom statuses (e.g., “Completed” or “Pending”) and press Enter to add them.
These values appear as options during approvals.
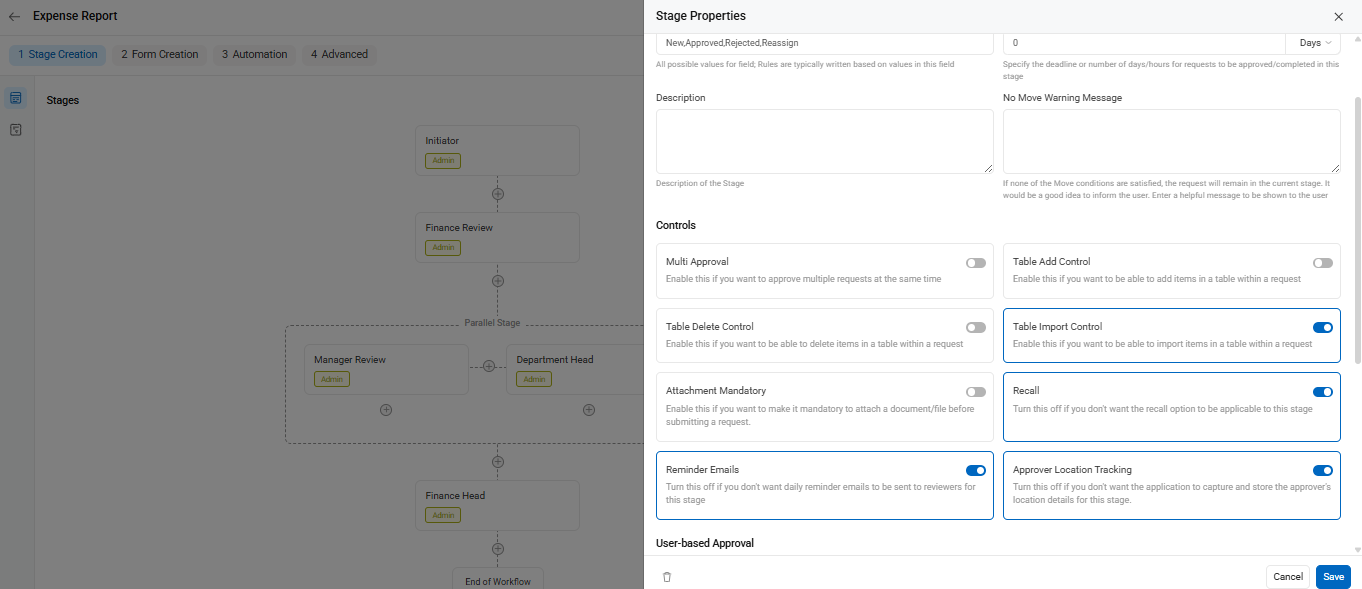
Review Controls
You can enable settings like:
- Multi-Approval: Multiple reviewers can act at once
- Reminder Emails: Send reminders to reviewers
- Attachment Mandatory: Ensure files are uploaded before approval
Once done, click Save to apply the settings.