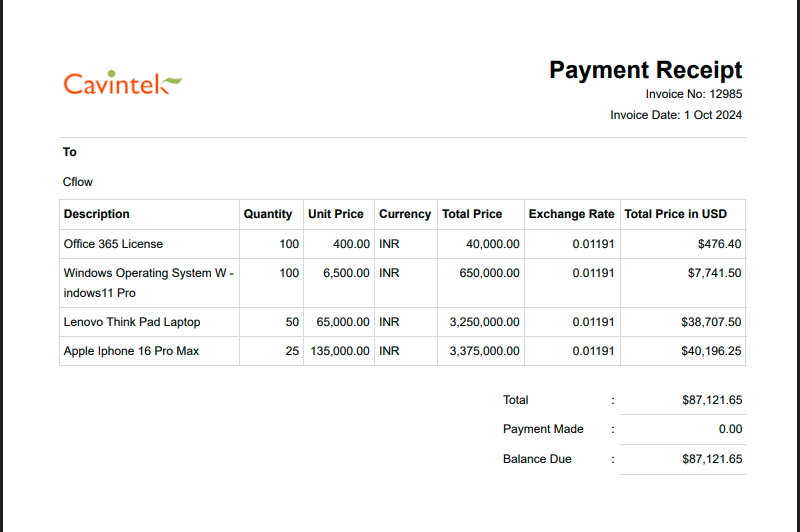
Cflow allows you to automatically generate and download customized PDF documents at runtime. These documents can also be emailed to stakeholders. The Document Designer in Cflow provides extensive design flexibility, enabling you to control layout, fields, labels, and embedded elements like QR codes and logos.
Step-by-Step Guide
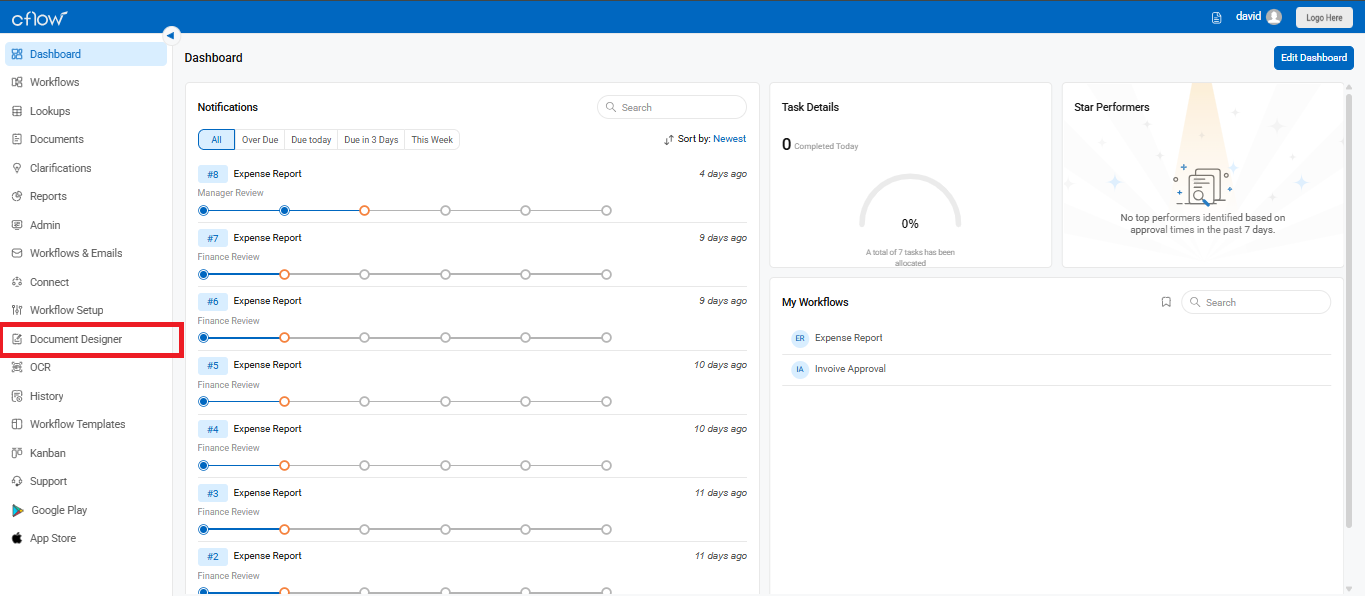
- Navigate to Document Designer
- From the left menu, select Document Designer.
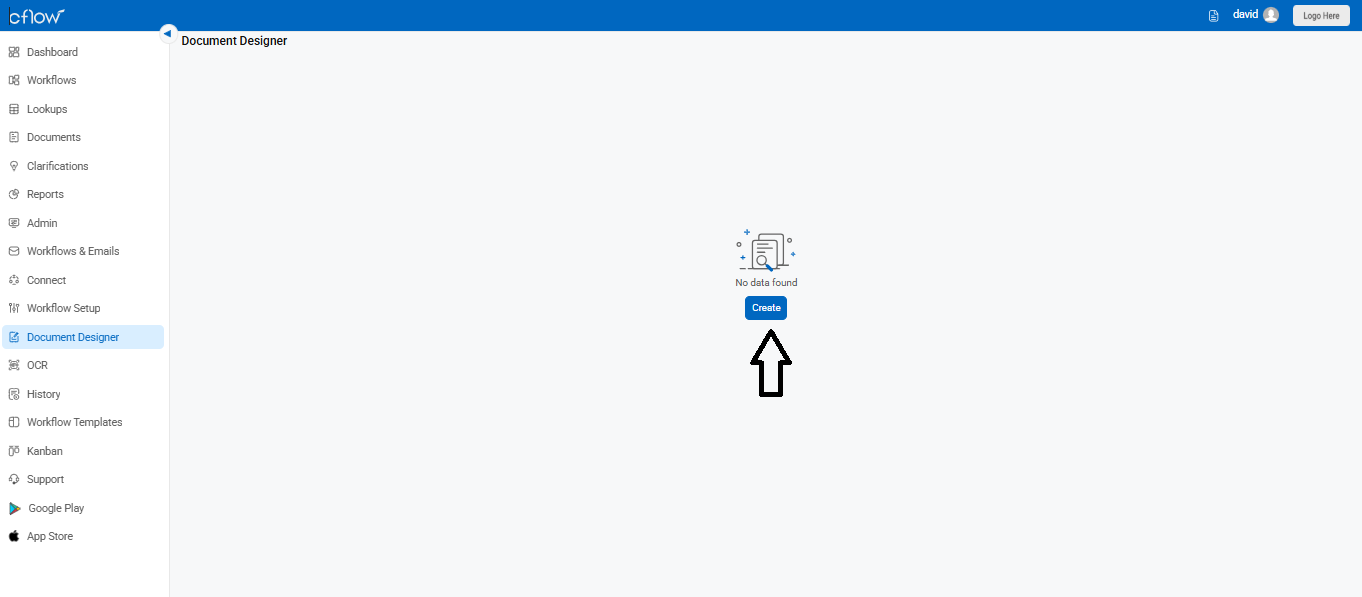
- If no templates are available yet, click Create to begin designing a new document.
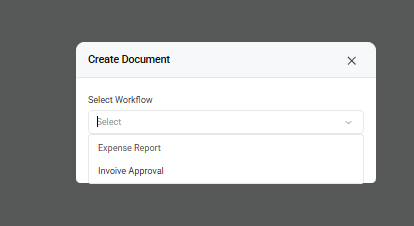
Choose Workflow
- In the pop-up, select the workflow (e.g., Expense Report or Invoice Approval) for which you want to design a custom document.
- Enter a clear name for your document so it’s easily identifiable.
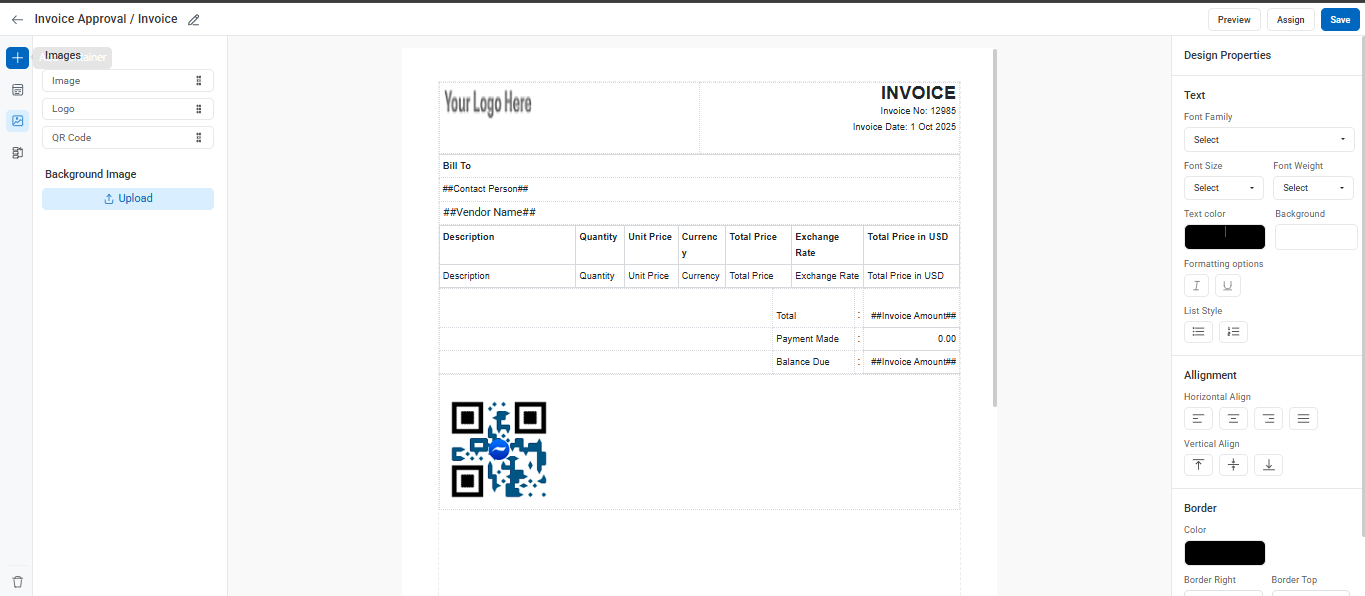
You can design the layout of the document with Fields, Tables, Logo and QR code. Organize your document by laying out containers and placing fields in them. The different containers available are – Field panel container, Large field panel container, Field table container, Horizontal Line. A brief explanation is given below:
Field Panel Container – Drag and drop the Field Panel Container from the layout. Now place the fields in the Field Panel Container based on your design and double click on the fields to edit. The table fields cannot be added in this container.
Large Field Panel Container – Drag and drop the Large Field Container if you have any large Textarea section in your workflow. This would be more useful when you have an address or large content in this section.
Field Table Container – Drag and drop the Field Table Container from the layout controls. Drag and drop the table that you want to add to the document. You can delete the columns that are not required.
Horizontal Line – Drag and drop the horizontal line from the layout controls to draw a horizontal line in the document.
You can add more elements to your document such as Custom label, Your Logo and QR code, Image. A brief explanation is given below:
Custom Label – Drag and Drop the custom label to add a custom text in the document.
Logo – Drag and drop the field Logo. The Logo you added in the Logo Setting (top left) is displayed here.
QR code – Drag and drop the QR code in the document. This will print the QR code in the pdf document when it is downloaded during runtime. The QR code maps to the request that is currently displayed on this screen. You can scan the QR code using the Cflow mobile app to go to the request details page directly.
Image – Drag and drop the Image in the document. You can upload an image file from your device.
A QR code (quick response code) is a type of 2D barcode that is used in Cflow to provide easy access to the request through a smartphone or tablet. Android users can read this QR code with the inbuilt QR scanner available in the Cflow app or using any third-party scanner apps whereas iOS users can read the QR code only with the inbuilt scanner available in the Cflow app. Third party scanner apps are not supported for iOS users.
Another cool feature is the ability to use the signature of the reviewer in your custom pdf document. The signature you added in the Signature Setup in your profile is displayed here. Let’s say if you want to add the manager signature in your custom pdf document, just drag and drop the field Manager Approved by in the document. If the reviewer in the manager role has added her signature then automatically the signature is displayed in the pdf document during runtime. You can also drag and drop the signature field that has been signed by the user or reviewer in the form.
To download or print this custom designed document, turn on the toggle Custom Layout in the form properties of the process stage and select the appropriate document. This enables the custom pdf button in the form for the corresponding stage of the workflow. Click on the custom pdf button to download or print the pdf document.