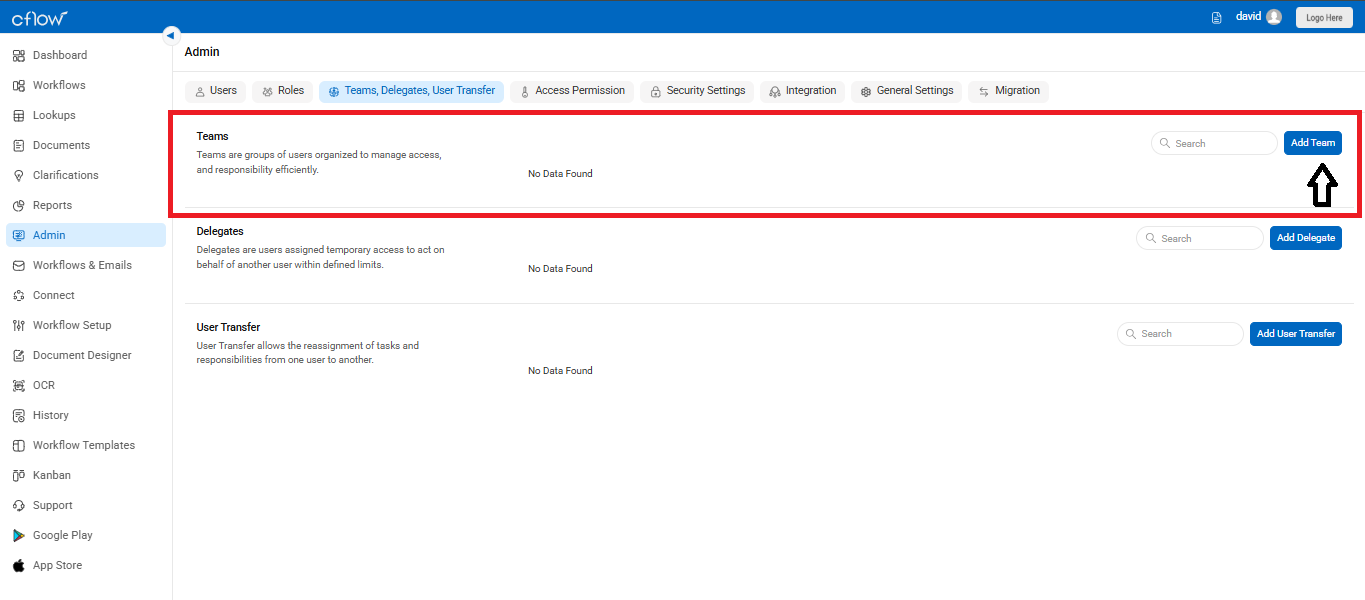
A team in Cflow is a group of users working together to manage access and responsibilities efficiently. For example, you may have teams like Marketing, IT, or Admin that require grouped permissions across workflows.
To create and manage teams:
- Go to Admin > Teams, Delegates, User Transfer.
- Click on Add Team to create a new team.
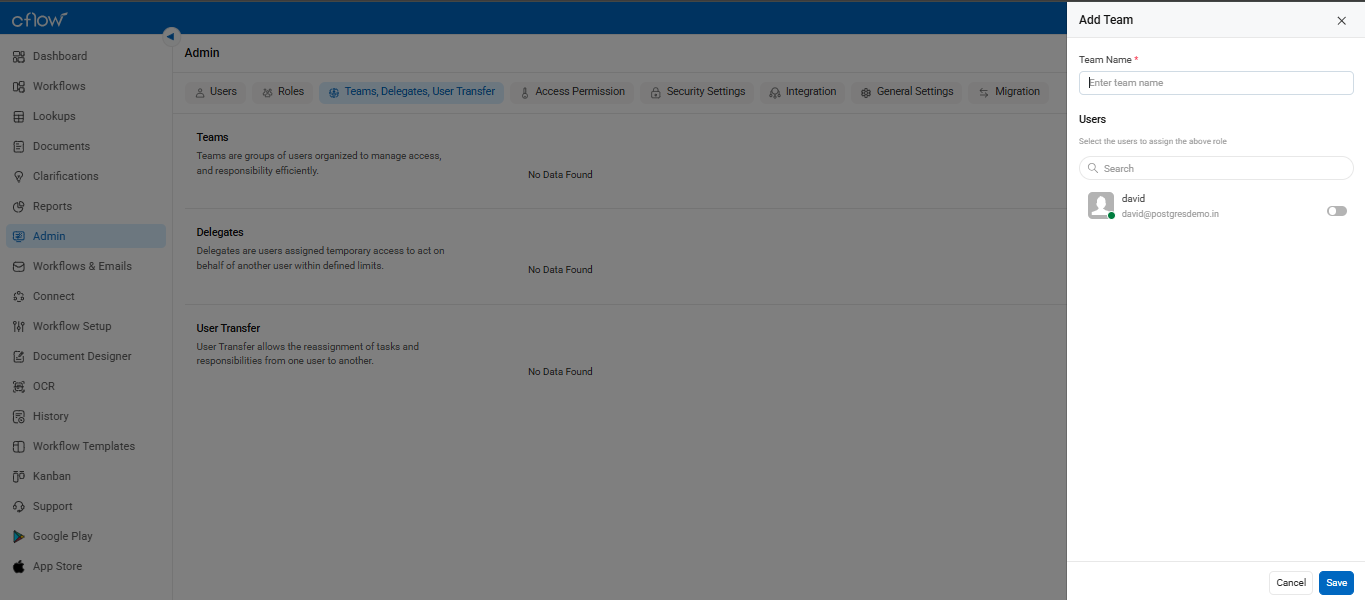
- In the right panel, enter the Team Name, then use the toggle next to each user’s name to add them to the team.
- Click Save to complete team creation.3
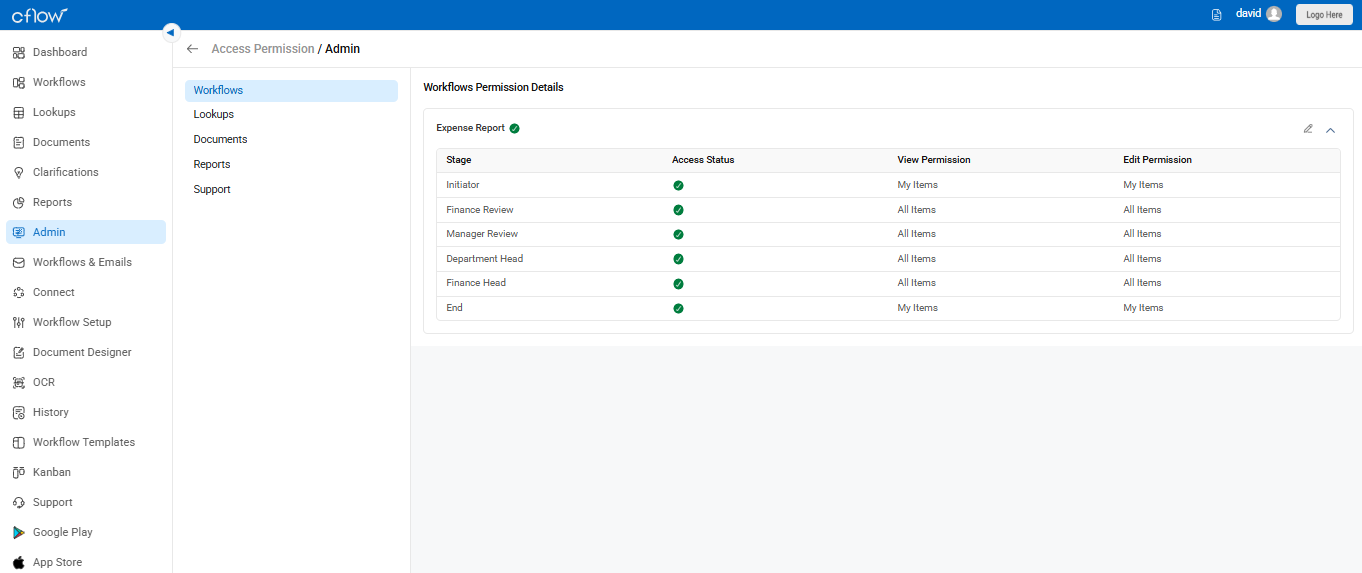
View and Configure Access Permissions for a Workflow in Cflow
- Go to the Admin section from the left-side navigation panel.
- Click on Access Permission under the Admin menu.
- Select the Workflows tab at the top of the screen.
- Choose the workflow (e.g., Expense Report) from the list shown. You’ll now see the Workflow Permission Details.
- For each stage (Initiator, Finance Review, Manager Review, etc.), you’ll see:
- Access Status: (Green tick if access is active)
- View Permission: (Set as My Items or All Items)
- Edit Permission: (Set as My Items or All Items)
- To modify the permissions, click on the pencil icon at the top-right corner of the table.
Select the appropriate View and Edit permissions for each stage:
- My Items: User can view/edit only their own requests.
- All Items: User can view/edit all requests in that stage.
- Click Save to apply your permission changes.