What is a Stage?
In the context of a workflow, a stage refers to a distinct step or phase within the overall process. It represents a specific set of activities or tasks that must be completed to progress from one phase to the next. Each stage typically has a well-defined purpose and is associated with specific inputs, outputs, and objectives.
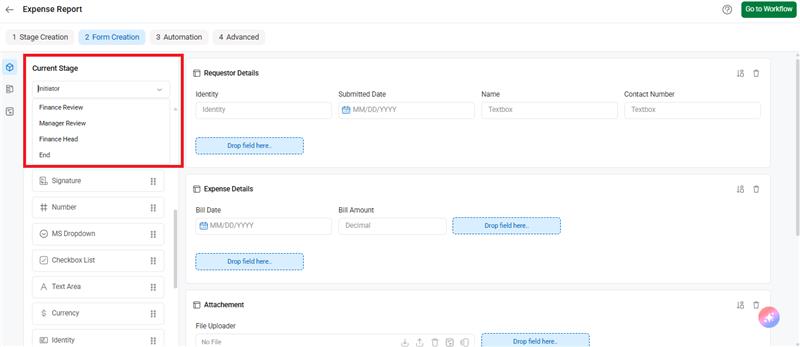
In Cflow, you can create a list of stages for any workflow. The advanced stage builder helps you construct these stages sequentially, using an intuitive drag-and-drop interface to easily modify their order.
Also, you can customize reviewers, set deadlines or Service Level Agreements (SLAs), configure calendar settings, and assign named approvers for each individual stage. This flexible functionality empowers users to efficiently design and tailor their workflows to meet specific business requirements.
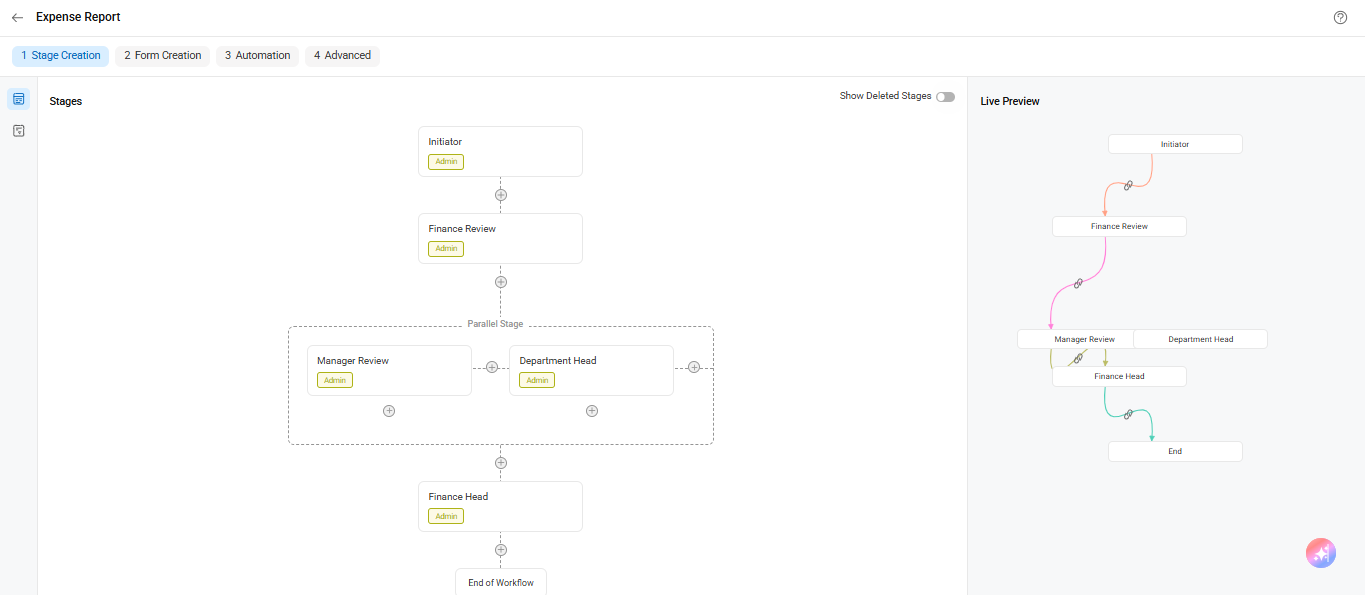
For example, “Initiator,” “Finance Review,” and “Manager Review” are all individual stages that must be completed before the workflow progresses.
Parallel Stages
Cflow offers a powerful feature that allows users to create parallel stages within workflows. This enables a request to move through multiple stages simultaneously, allowing each assigned reviewer to independently evaluate the request.
This parallel processing not only accelerates approvals but also highlights the benefits of a streamlined, web-based workflow system. An important aspect of parallel stage setup is that a record can proceed to the next stage only after all parallel stage reviews are completed.
Parallel Stages – Parallel Exit Configuration
Cflow offers another distinctive feature that sets it apart from other applications: the ability to create a parallel exit. This unique feature enables users to design sub-process stages within parallel stages. Here, the request moves within a leg of the parallel flow independently, but will come out of the parallel flow only after all parallel stages have obtained the necessary approvals. This feature enhances flexibility and control of workflow
Sub-Stages
The sub-stages serve as an internal progression within the parallel stages enabling users to have a more detailed and granular flow within the overall workflow. This makes handling and coordination of tasks much easier enhancing efficiency and control.
Steps in stage creation
When you land the first time,
- You will see a popup where you will enter the workflow name.
- The workflow will be created with the Initiator stage and END stage as default.
- You can click the ADD Stage button to create new stages as per your requirement.
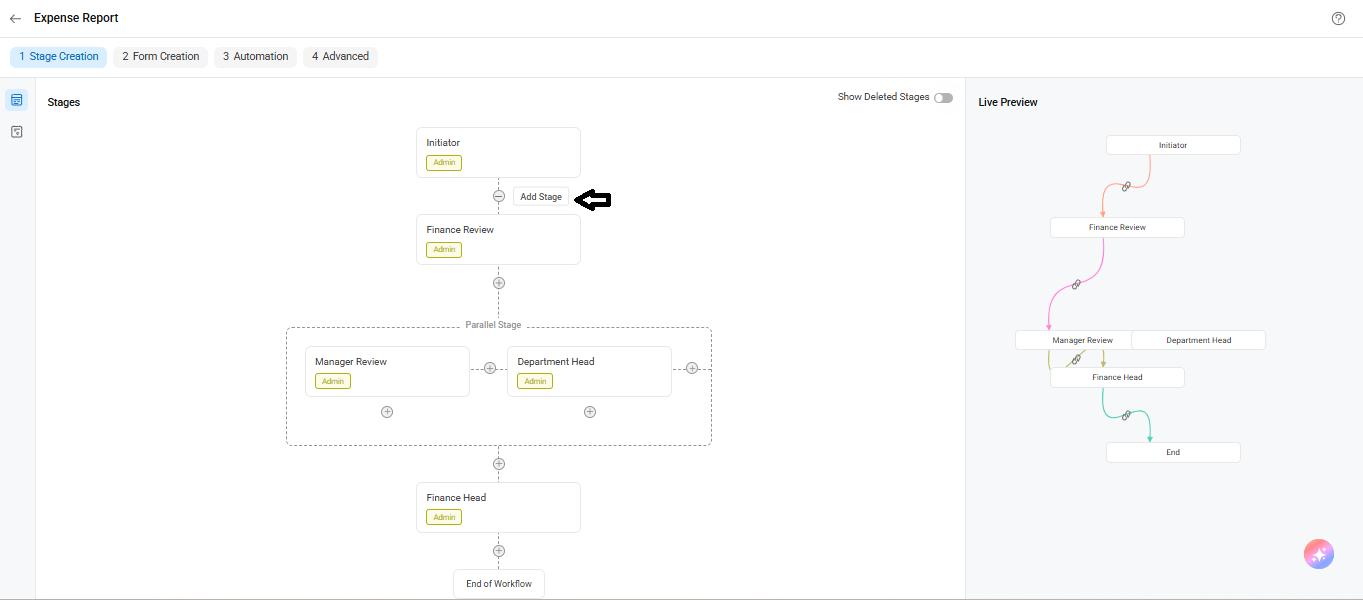
When you create a new stage
- A database call will be initiated to ensure that the stage details are stored.
- You can change the properties of the stage which grants flexibility and customization within the workflow.
When you move a stage from one position to another
- The order of stages is automatically adjusted, reflecting the new arrangement and ensuring a coherent sequence within the workflow.
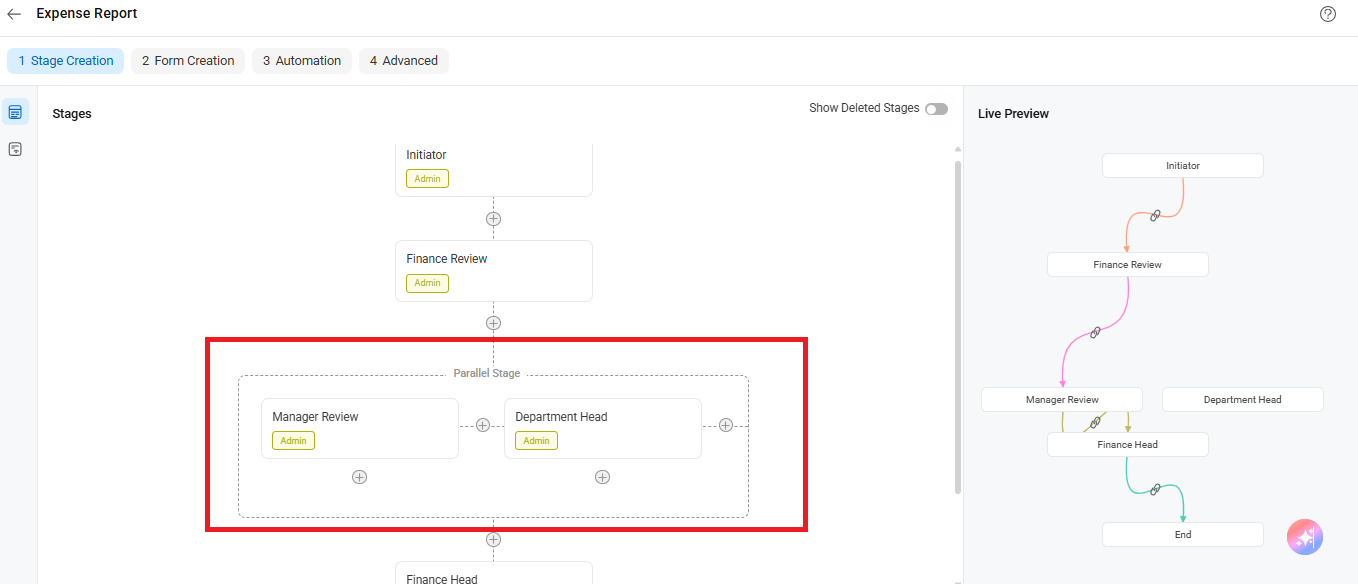
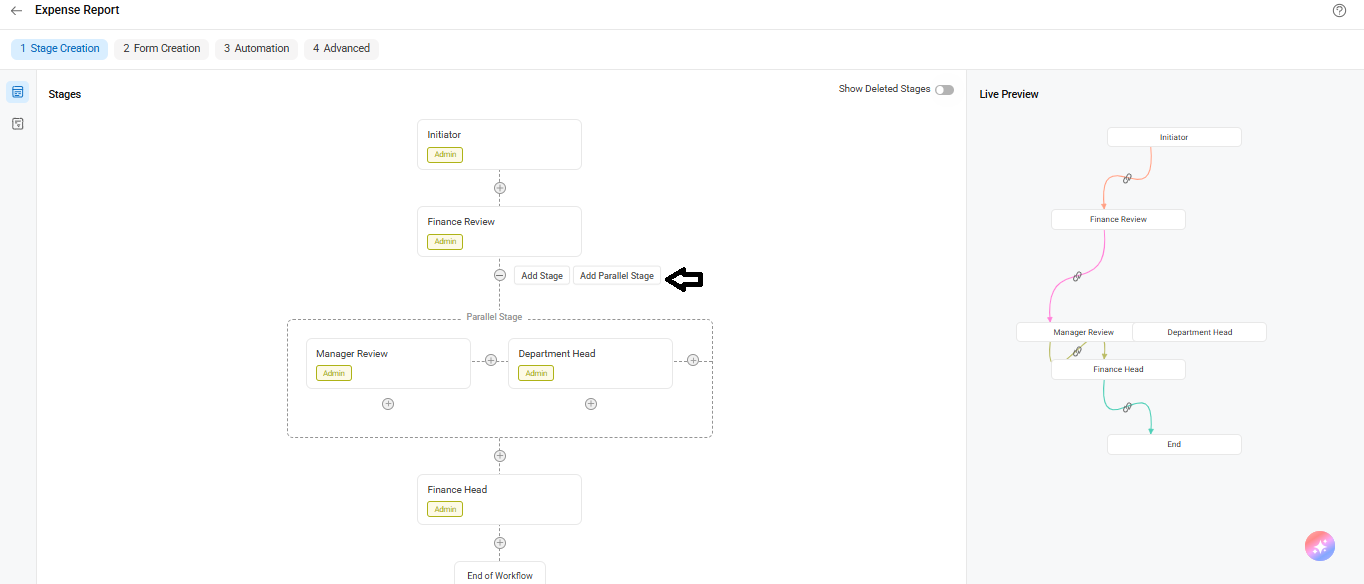
When you want to create a new parallel stage
- Within each stage, you will see a plus button that enables additional options.
- Expanding this plus button reveals two buttons: “Add Stage” and “Add Parallel Stage.”
- Clicking on “Add Parallel Stage” generates a new stage, both the new stage and the selected stage are placed within a parallel container.
- As a result, all the stages within the container become a parallel group, indicating that their approvals can progress simultaneously.
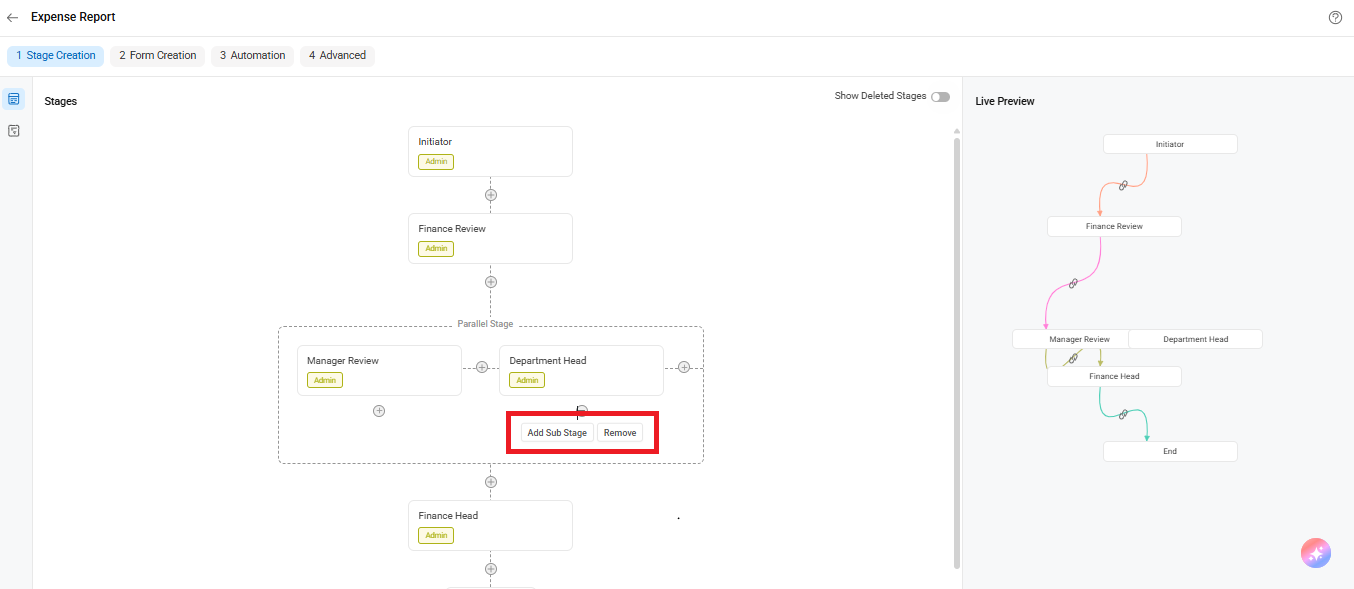
When you want to create a new stage inside the parallel container
- Whenever you create a new stage inside the parallel container it automatically becomes a parallel stage.
- Within the parallel container, each stage is equipped with a plus button.
- Clicking on the plus button of a selected stage reveals three more buttons: “Add Stage”, “Add Sub Stage,” and “Remove”
- By selecting “Add Stage,” a new parallel stage is added to the existing ones within the container.
- When you opt for a “Add Sub Stage”, a new sub-stage is generated specifically for the selected stage. The latest sub-stage created becomes the exit stage for that particular stage.
- Selecting “Remove” removes the stage from the parallel stage group. However, if the stage contains sub-stages, it cannot be removed directly.
- Instead, a warning message will appear which prompts the user to remove the sub-stages first.
- Upon removing the parallel configuration within the parallel container, a minimum of two parallel stages is enforced.
- If the count falls below two, the remaining stage is extracted from the container and converted into a normal stage.
To Add a stage –

To Add a parallel stage
To Remove from parallel stage