If you’re trying Cflow for the first time, you can get hands-on in just a few steps. Here’s how to evaluate the platform:
1. Create or Import a Workflow
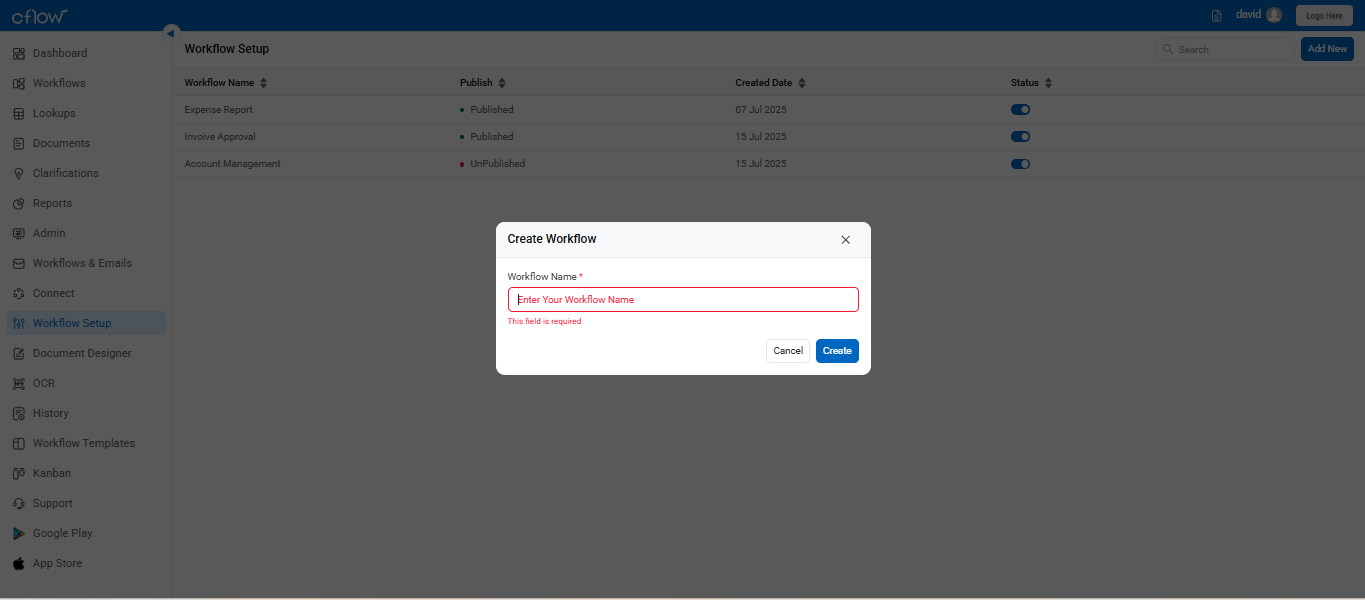
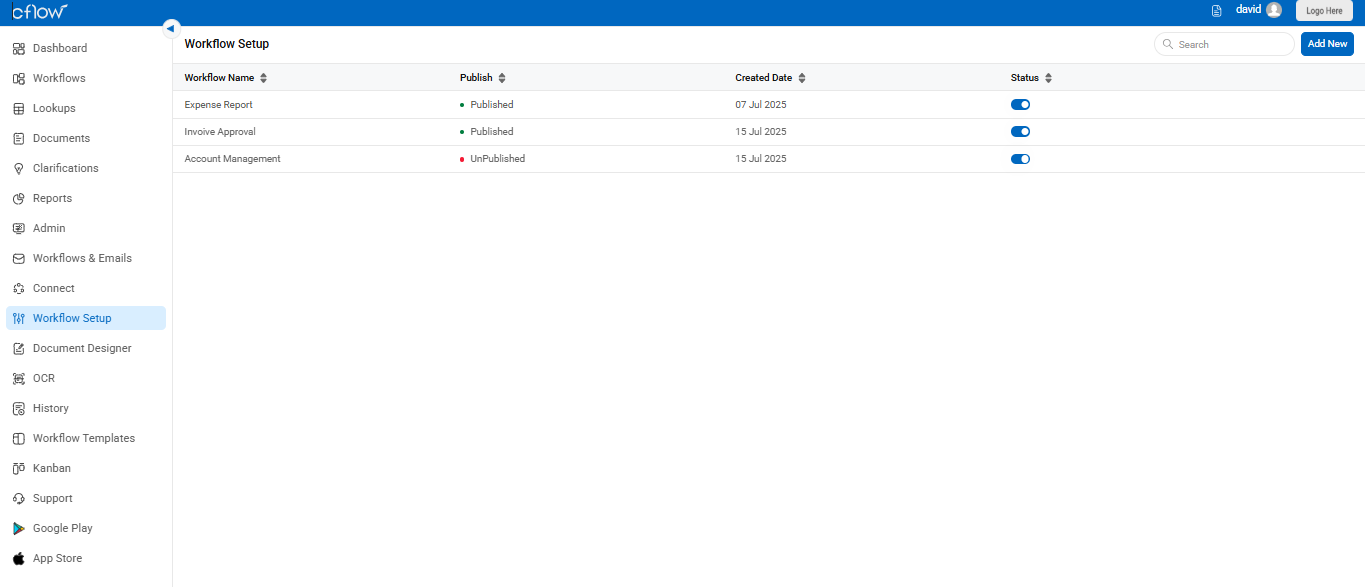
From the Workflow Setup screen, click Add New to create a custom workflow. Assign a name like “Expense Report” or “Account Management.” Cflow also lets you import a ready-made workflow if you’re short on time, ideal for getting started quickly.
2. Initiate a Request
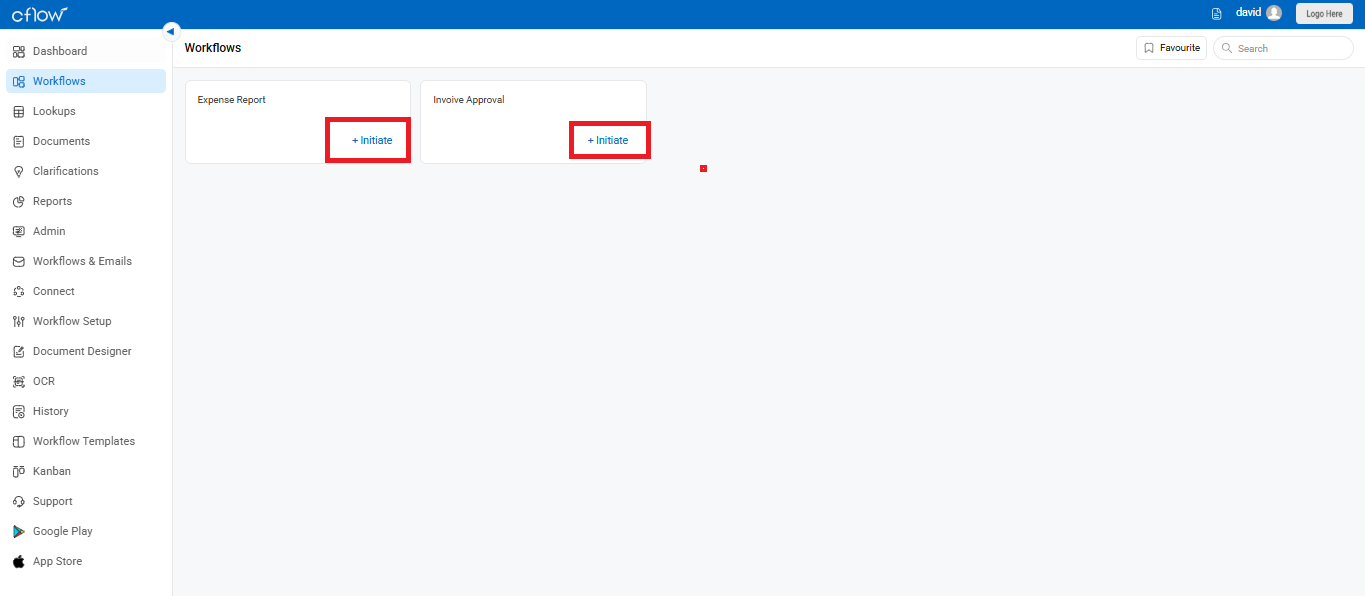
Navigate to the Workflows section and click +Initiate under any published workflow. This allows you to submit a new form and start testing the process.
3. Approve Requests
Click on the notification on your dashboard and review the form details. Go ahead and approve the request to send it to the next stage. You have been granted access to that stage as well, and you will see the request in your dashboard.

4. Customize and Configure
Once you have tried to end request, you can customize your workflow by clicking on the workflow setup.
5. Invite Team Members
Collaborate by inviting your co-workers. Once they’re in, assign them roles and let them participate in approval stages. Cflow sends automatic email invites with a few basic details.
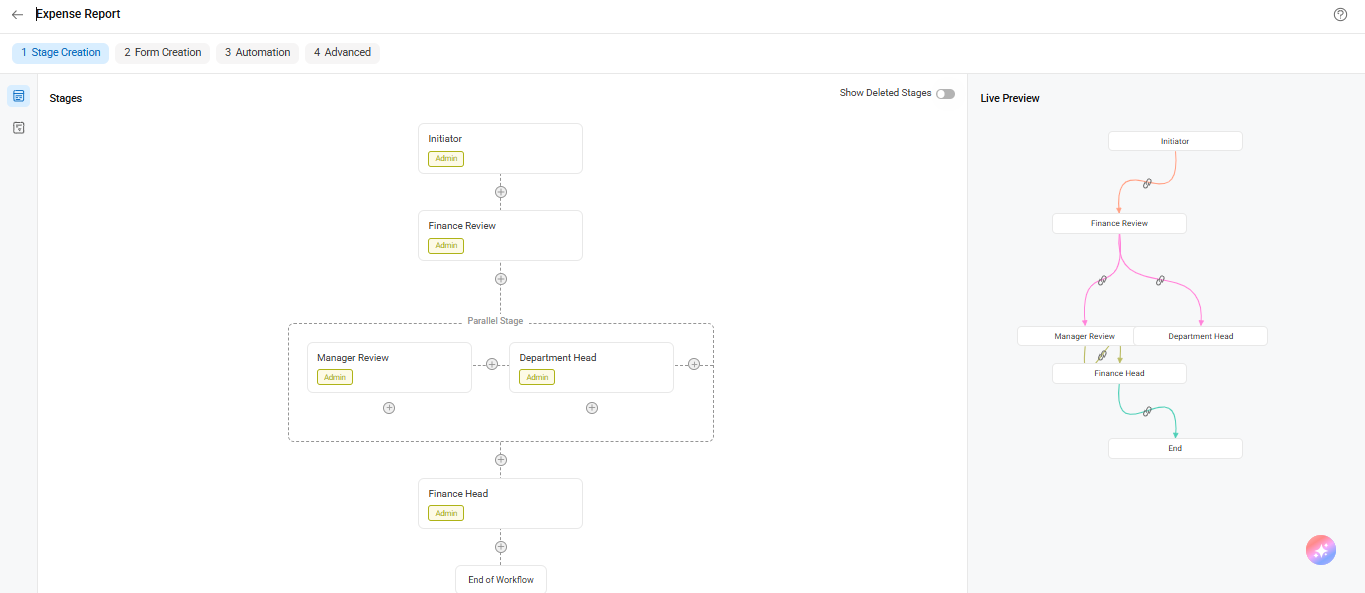
The Stage Diagram below offers a bird’s-eye view of your process.