Cflow’s Scheduler allows you to automate actions such as moving a request to the next stage after a set duration. This helps prevent delays when a request remains pending at a particular stage for too long (e.g., auto-approvals based on SLA).
Steps to Configure a Scheduled Action:
- Go to Workflow Setup from the dashboard.
- Select the desired workflow.
- Click on the Advanced tab.
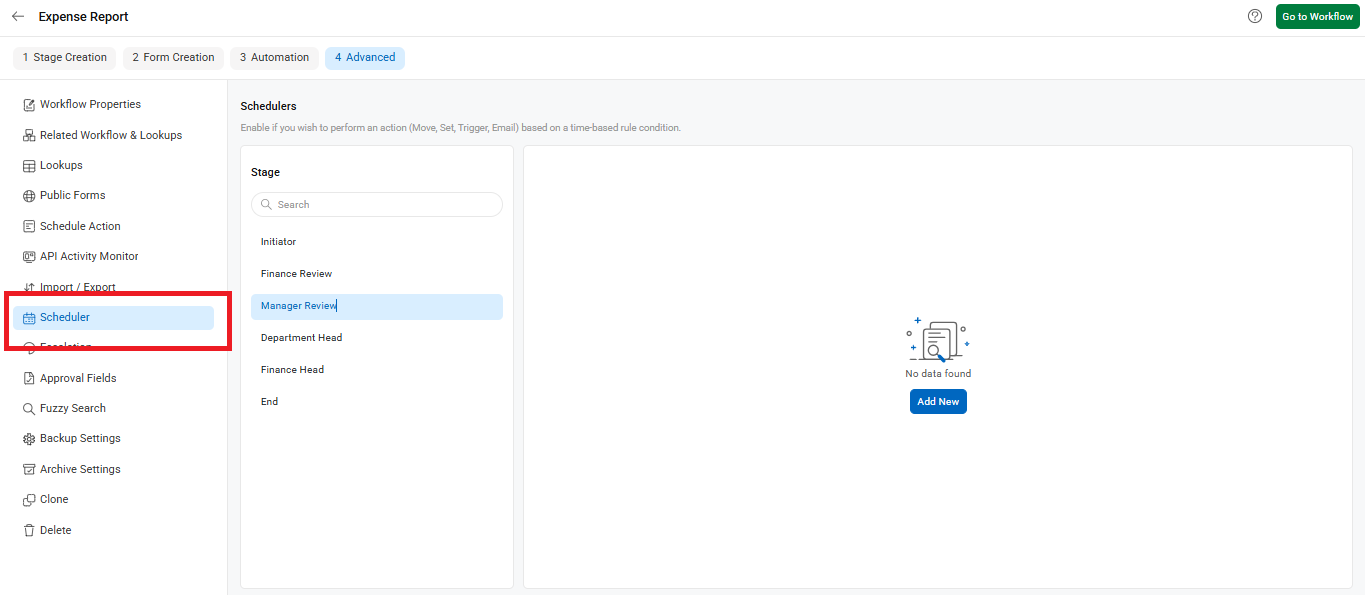
- In the left panel, click on Scheduler.
- From the Stage dropdown, select the stage (e.g., Manager Review) where the rule should apply.
- Click Add to configure a new scheduled action.
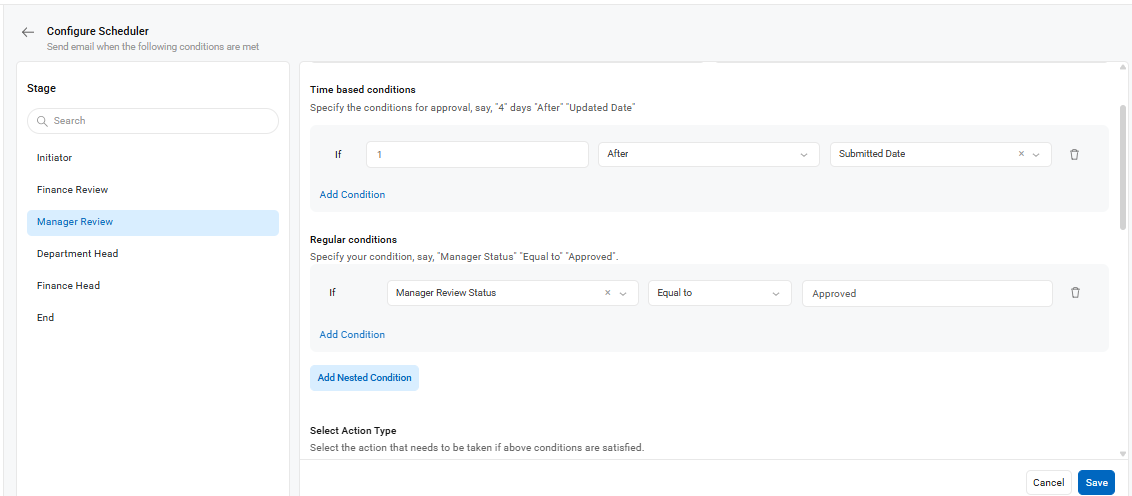
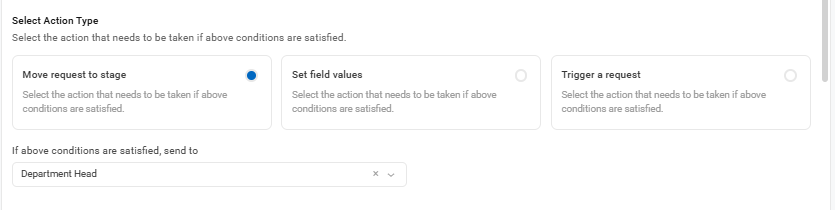
- Define the time-based condition (e.g., After 1 day from Created Date) and the action (e.g., Move to next stage).
- Click Save to apply the changes.
The Scheduler in Cflow is used to automate actions based on specific time conditions. A common use case is auto-approval, where the system automatically moves a request to the next stage if it has been pending beyond a defined time limit.
For example, consider a request that is waiting at the Manager Review stage with an SLA of two days. If the manager does not take action within one day from the submission date, the Scheduler can automatically approve the request and move it to the next stage, such as Department Head Review.
This ensures that requests don’t remain stuck in one stage for too long, improving process flow and compliance with SLAs.
The screenshot below illustrates how conditions can be set to move a request from one stage to another automatically.
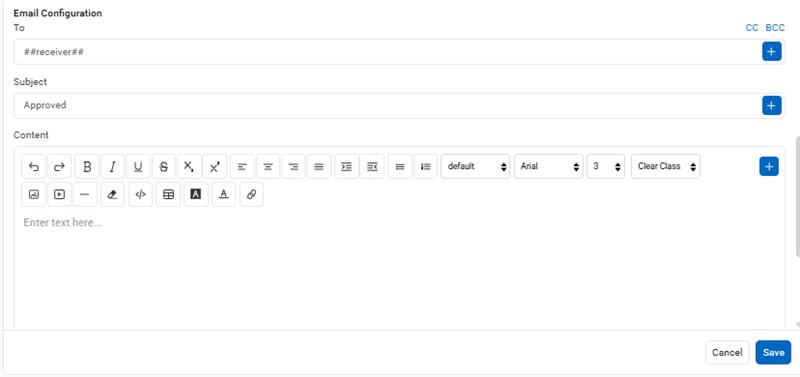
Email Notification Options
You can configure email alerts for scheduled actions:
- To: Enter recipient email IDs.
- Subject: Add your email subject line.
- Message: Customize the body content using formatting controls.
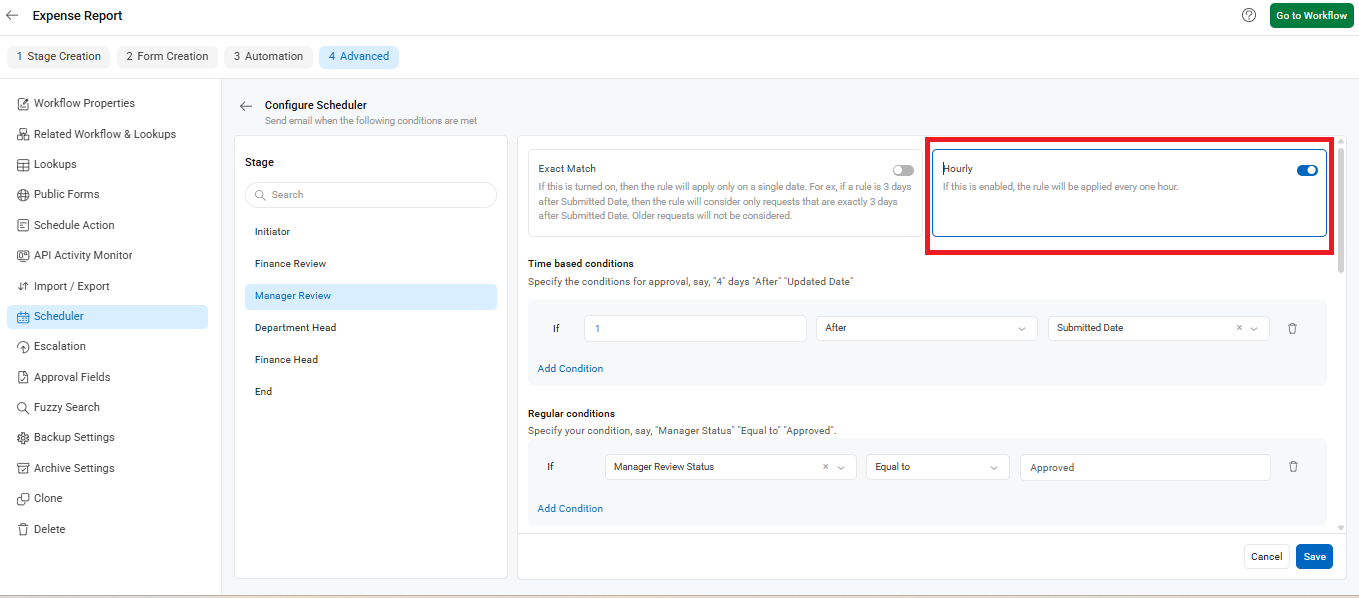
- Hourly Toggle: Turn ON if you want the email to be triggered hourly.
- Attach Documents: Enable this to include attachments uploaded in the form.
- Send Custom PDF: You can also include a system-generated custom PDF as an email attachment.
Turn on ‘Attach Documents’ to send the attachments uploaded in the form via email. You can also send custom-designed PDF attachments through email.
