Cflow offers powerful customization capabilities that let you tailor both forms and workflow stages to fit your exact process needs. Follow these step-by-step instructions:
- Accessing the Workflow Setup
- From the Dashboard, go to the left menu and click on Workflow Setup.
- Select the workflow you wish to modify (e.g., Expense Report).
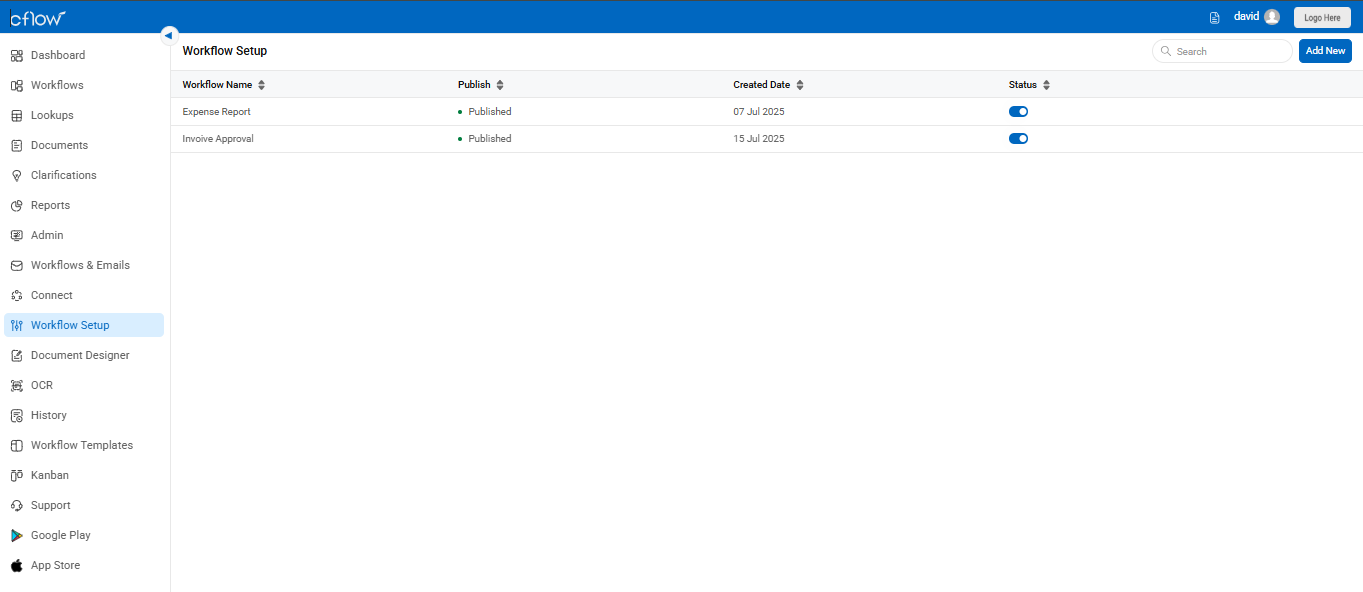
- Once selected, click on Form Creation to begin customizing.
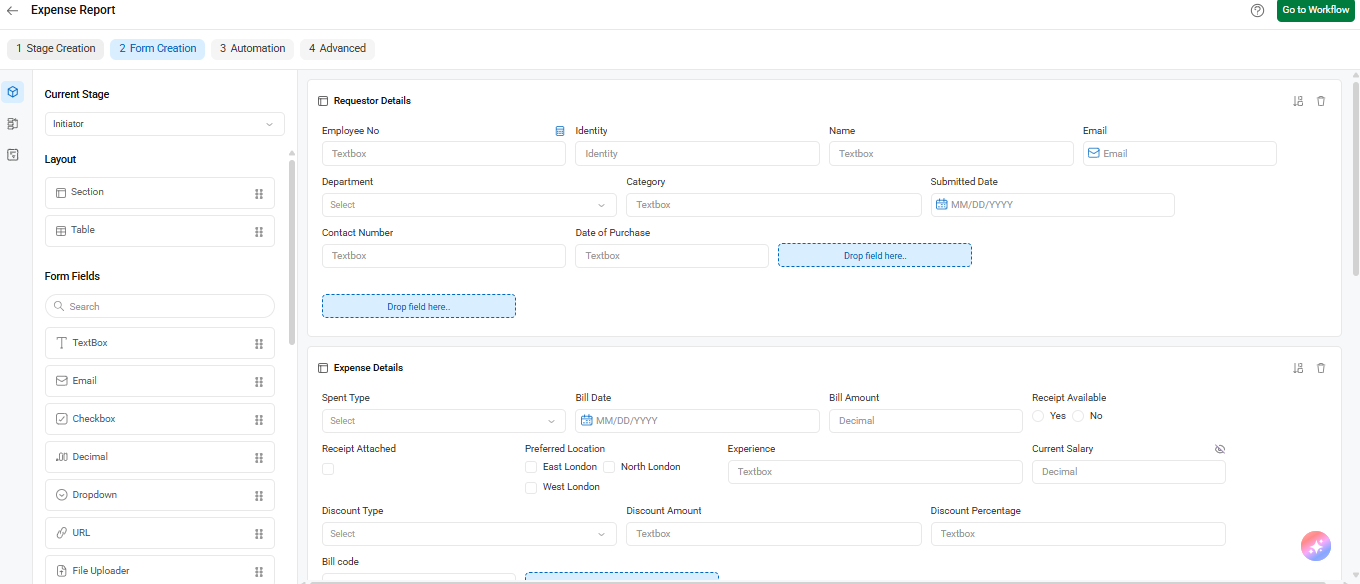
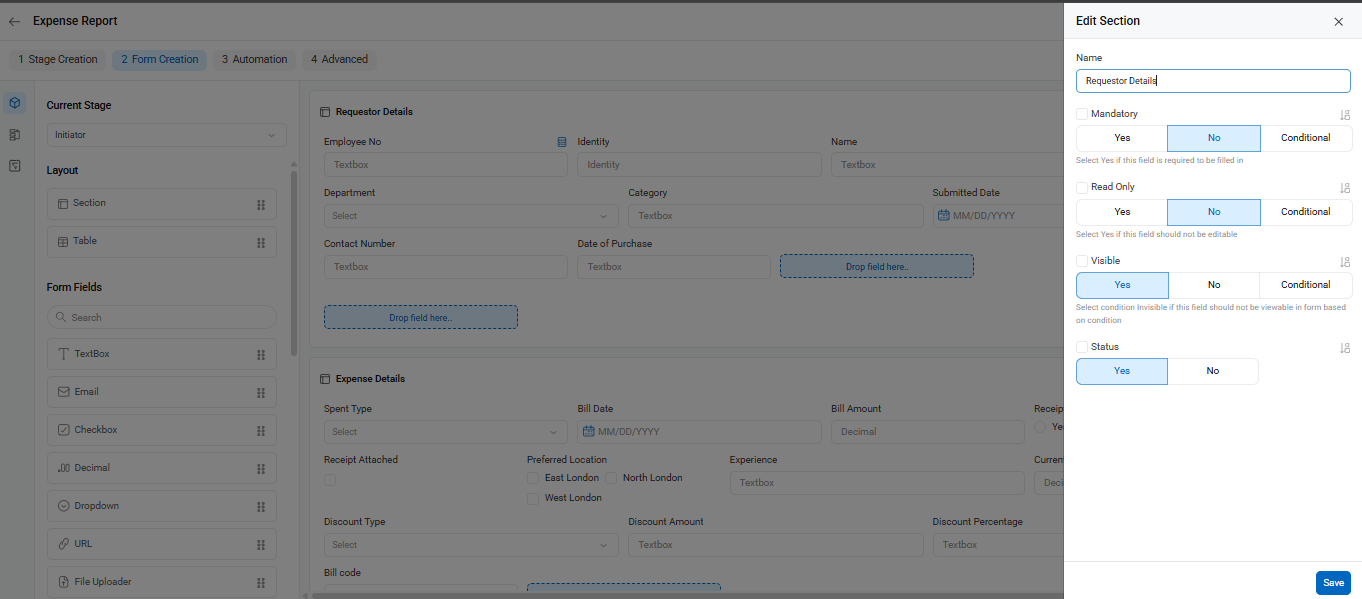
- In the Form Creation tab, you will see your layout separated by sections such as Requester Details and Expense Details
- To edit a section, click on the Edit icon (pencil) next to the section name.
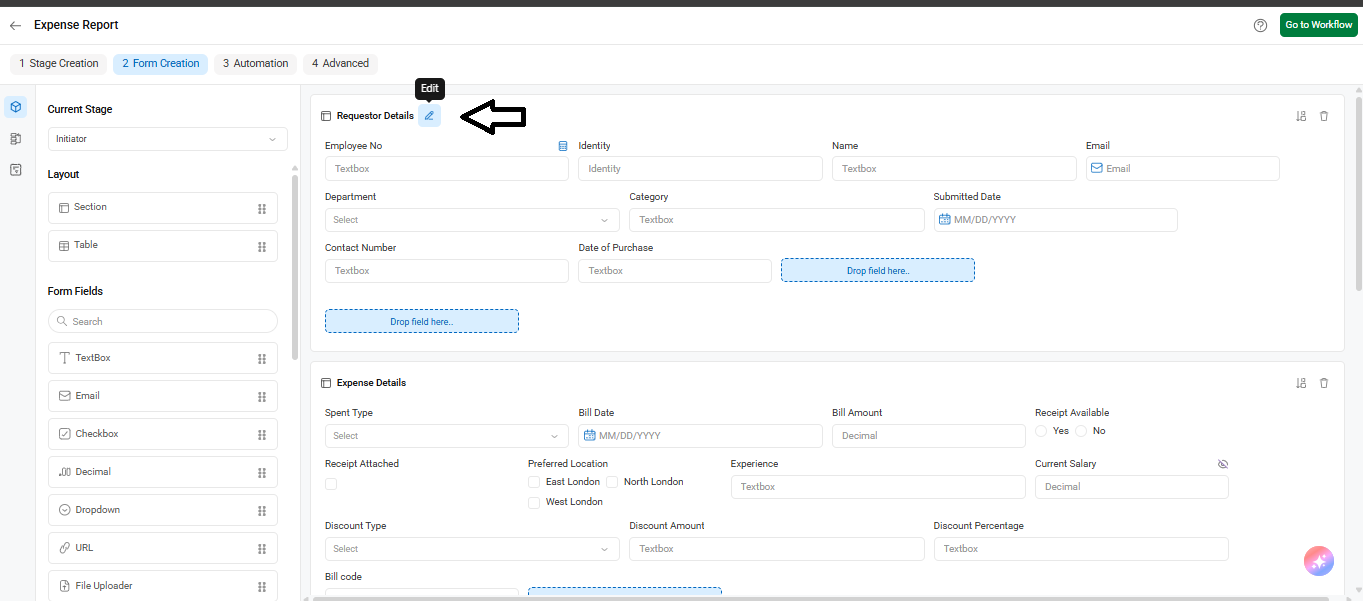
A side panel will appear where you can:
- Rename the section
- Set Mandatory, Read-Only, Visible, or Status options.
- After making changes, click Save.
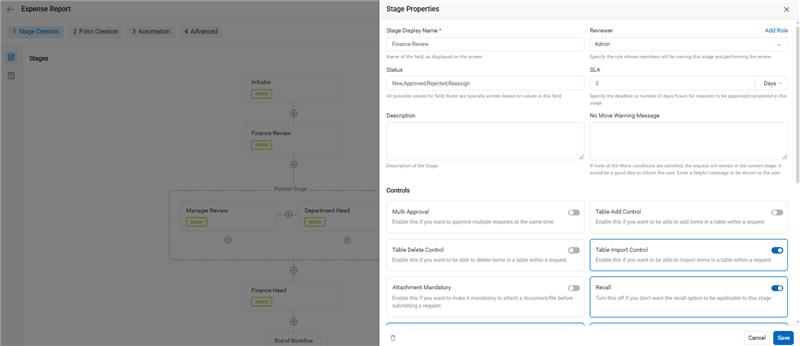
Editing Stage Properties
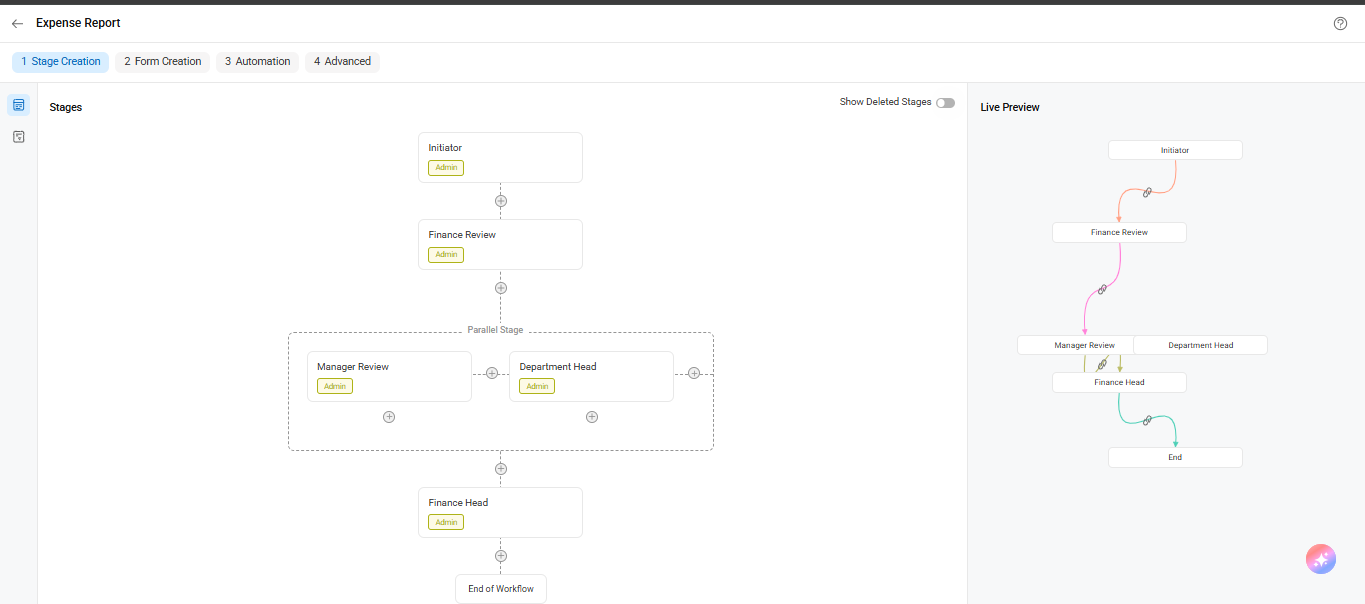
- To change workflow stage behavior, go to the Stage Creation tab.
- Click on a stage (like Finance Review or Manager Review) to open the Stage Properties panel.
Here you can:
- Rename the Stage Display Name
- Set the Reviewer Role (who is allowed to review the request)
- Define the Status Field
- Set SLA in Days (defines how long a reviewer has to complete the stage)
- Enter a No Move Warning Message if specific fields must be completed before progressing
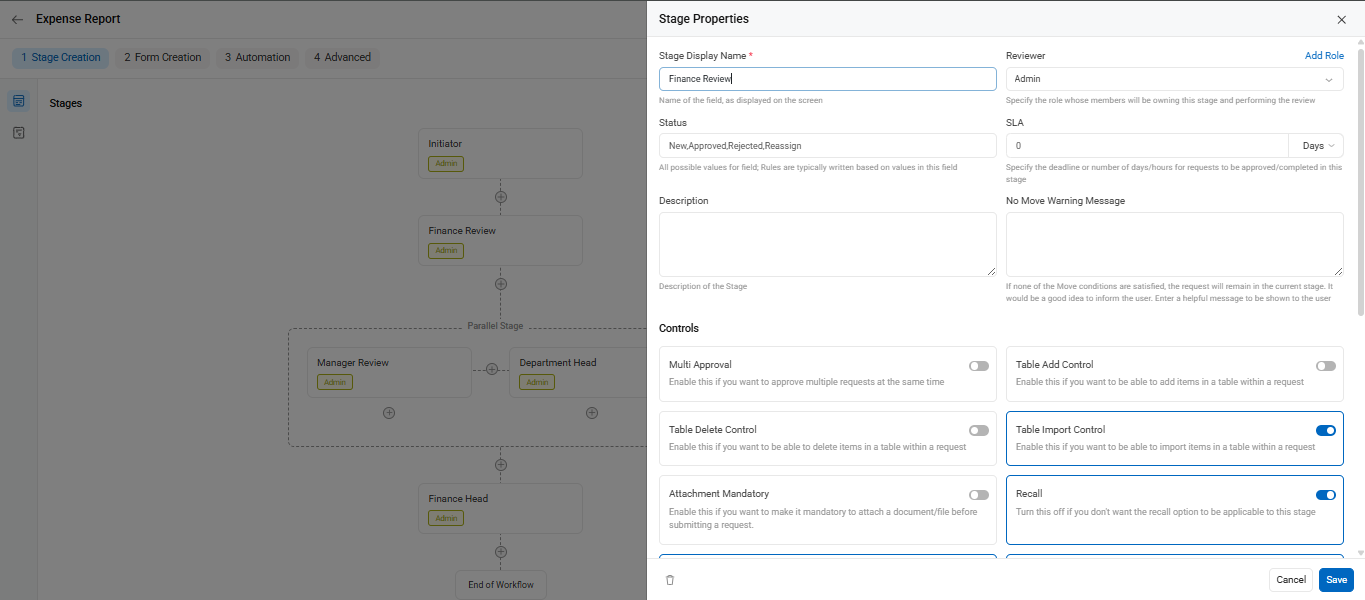
Configuring Stage-Level Controls
From the same Stage Properties panel, under Controls, you can toggle on/off these options:
- Multi Approval – Allow multiple requests to be approved at once.
- Table Add/Delete Control – Enable row-level actions in tables.
- Table Import Control – Let users upload data into tables via CSV.
- Attachment Mandatory – Force users to upload a document before submitting.
- Recall – Allow users to pull back requests they submitted.
- Location Tracking – Track where approvals are made from (Note: not applicable for initiator stage).
- Delete Control – Allow deletion of requests from the inbox (only in the first stage).
- Create Request – Turn on the ‘+’ icon to initiate a new request from dashboard or inbox.
- Make sure to click Save after toggling controls.
The below screenshot illustrates the stage properties in the reviewer stage: