Select Workflow Setup from the left side menu, then click the Create Workflow button on the top right.
The steps involved in creating a workflow are given below-
1- Request Initiation – A request initiator is the user that initiates a request. When a user initiates the request and submits the form, it moves to the next stages of approval. You can assign a specific role in the initiator field while creating a new workflow. The person/role specified can initiate a request in this workflow. Initiators can be changed at any time by selecting Stage Properties->More Options tabs.
For example, initiation of a sales request in the Sales Incentive Claim Workflow can be done by assigning the Sales team to a “sales” role and setting this role as the initiator. View and edit permissions for a role can be configured by following the path below
Admin-> Users, Roles, and Permissions->Access Permissions
2- Adding process stage – The gathering of information or review is done in the process stage of the workflow. To add a process stage, you need to click on the “add process stage” icon as shown below.

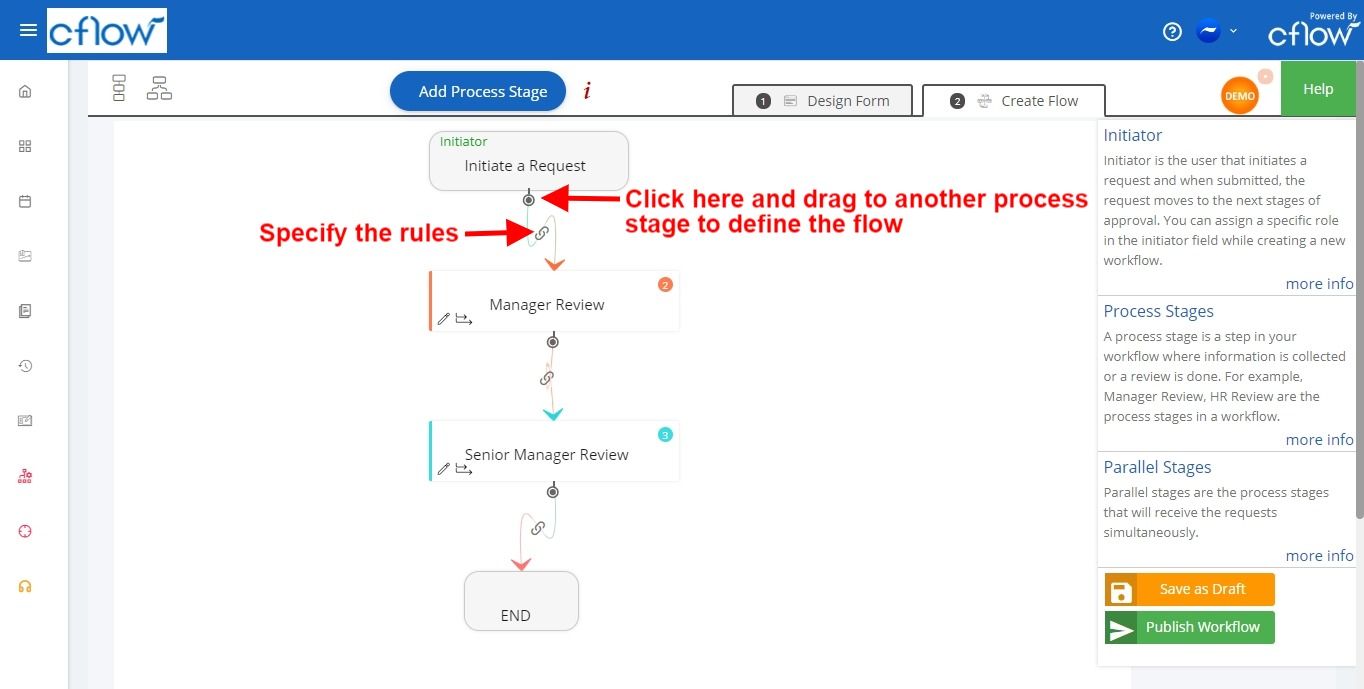
3. Define the flow – To define the flow of work from one stage to another, click and drag the mouse from one stage to another to connect two stages as shown in the picture below. You can click on the Connector icon to specify the conditions to move the request from one stage to another.
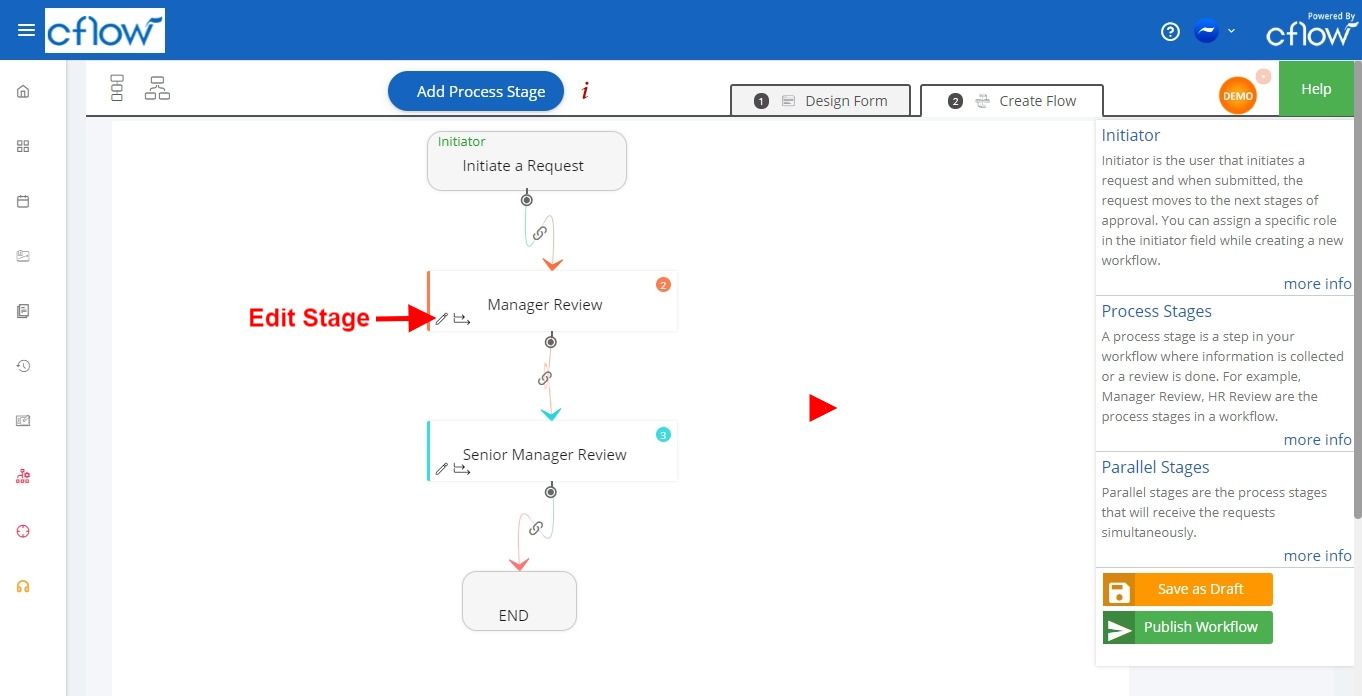
4. Edit Stage – To specify the attributes of the process stage, click on the pencil icon as shown in the picture below. You can edit the status values and assign a reviewer role. View the list of users assigned in a role and also assign a user to a role. Creating a new role and a new user can be done here.
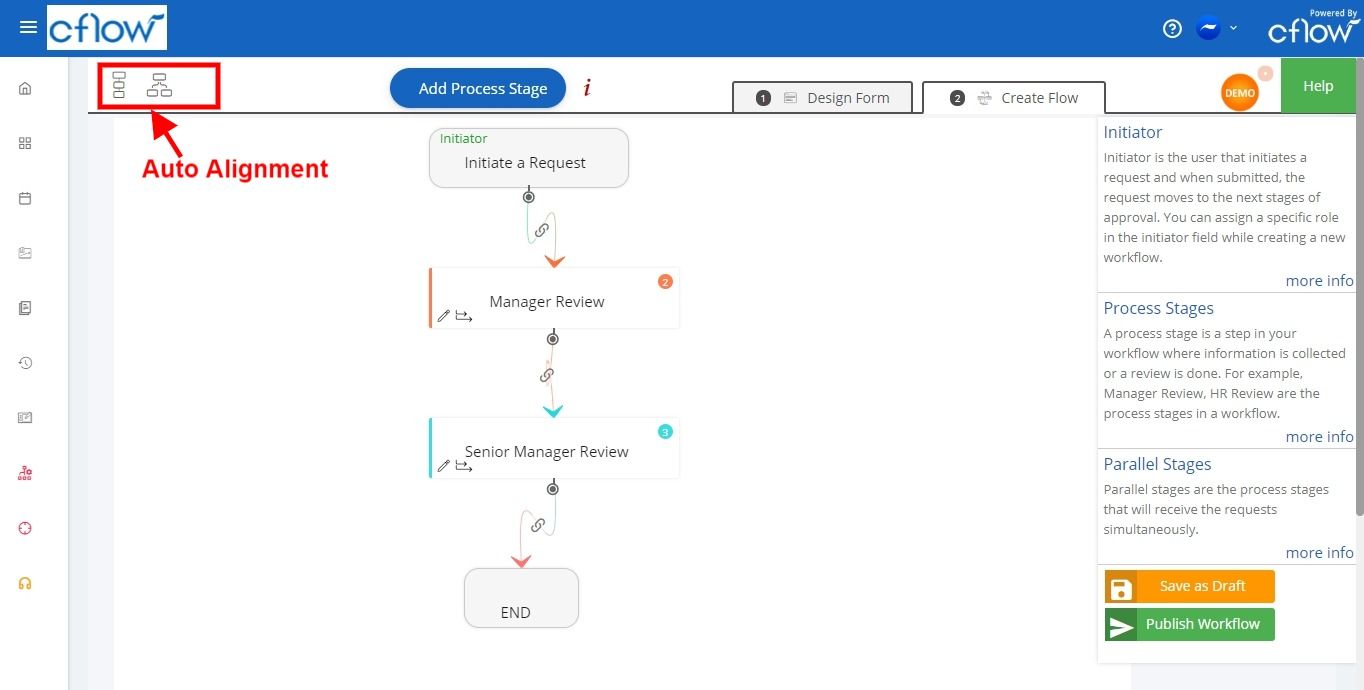
5. Auto alignment – Auto align the process to make it readable and validate your flow. Click on the auto align icon as shown in the picture below.
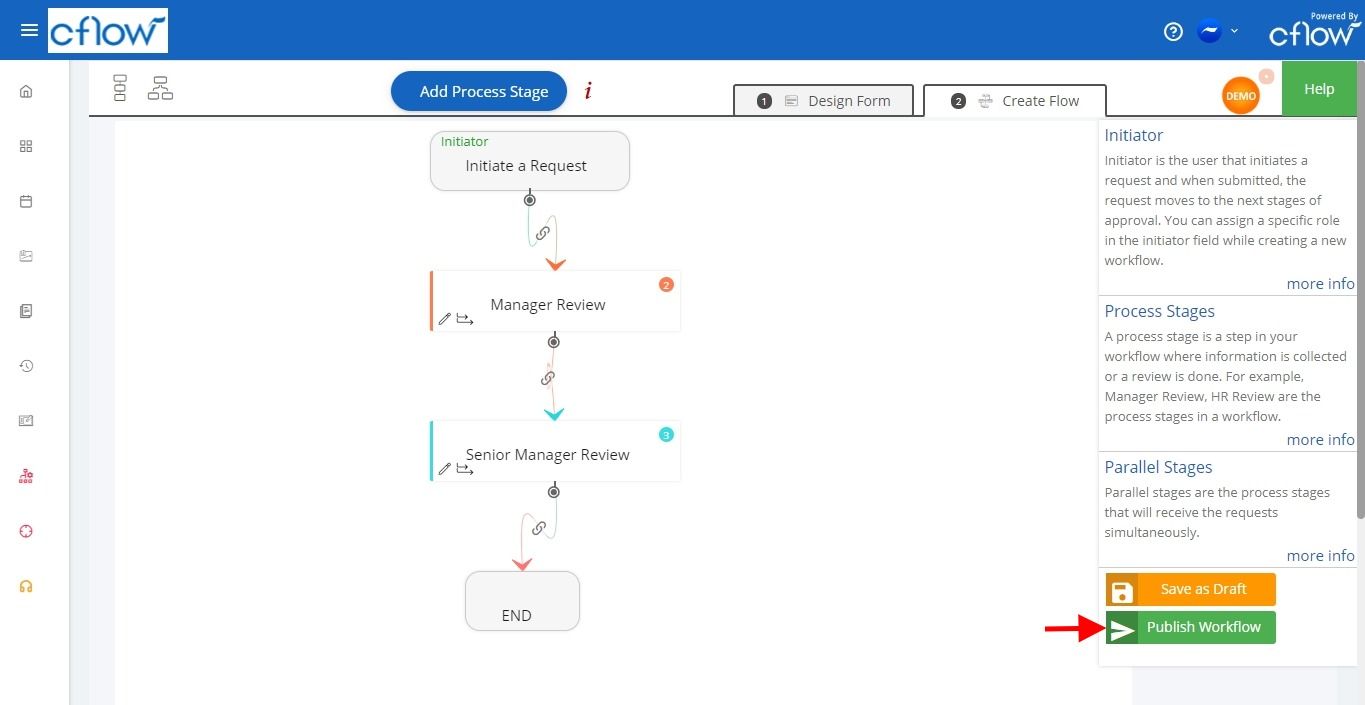
6. Draft Workflow – If your workflow is still in progress, save your workflow as a draft. Click on the save icon below the submit button as shown in the picture below. Saved workflows can be accessed from My Workflows tab page.
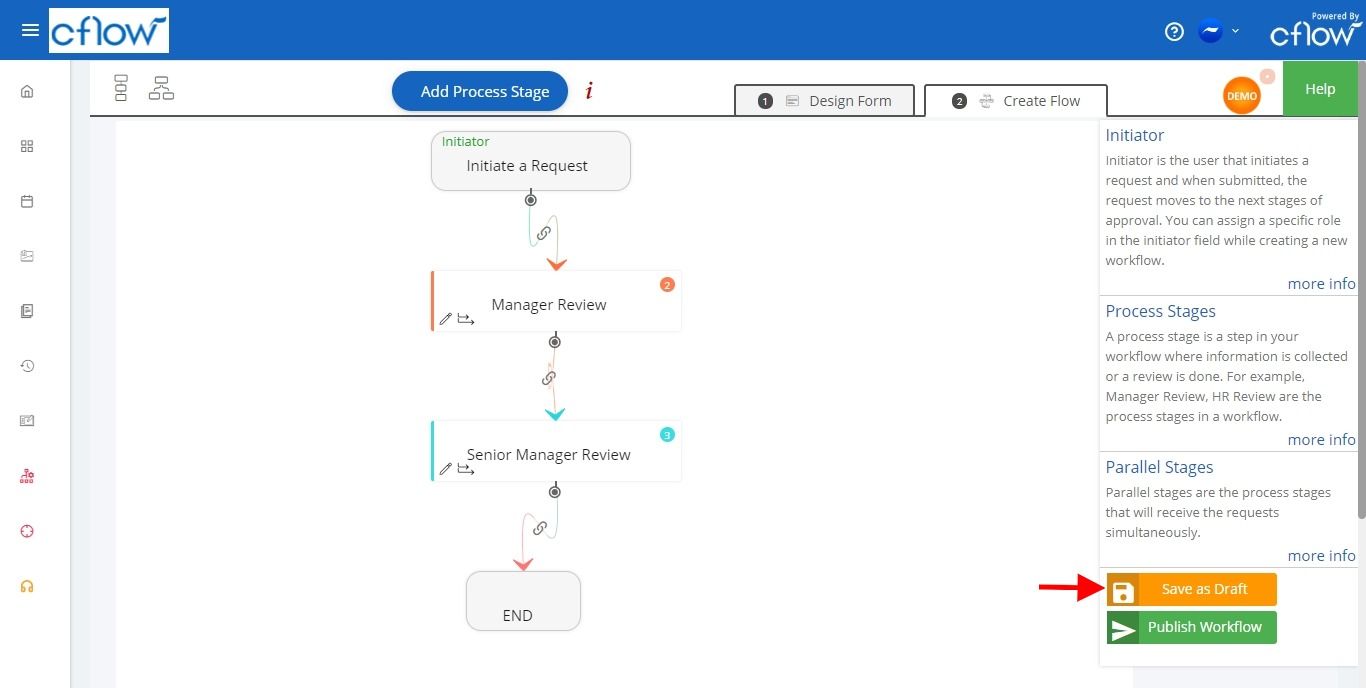
7. Publish Workflow – If your workflow is completed, click on the Publish icon to publish the workflow. Publish will create the necessary backend infrastructure so that the workflow can be used immediately. Published workflows may be accessed from the Dashboard page, based on the access permissions. Once a workflow is published, all further configuration should be done in the Admin -> Workflows and not from the My Workflows tab page.