Cflow provides a public form feature that enables a non-Cflow user to submit a form. You can use the public form in many ways depending on your business needs. For example, you can use the public form to receive feedback, as a registration form, and so on. Using the public form feature, users who don’t have a login in Cflow can still initiate a request in a workflow.
- Go to Workflow Setup -> Workflows
- Select a workflow and click on Advanced -> Public Form
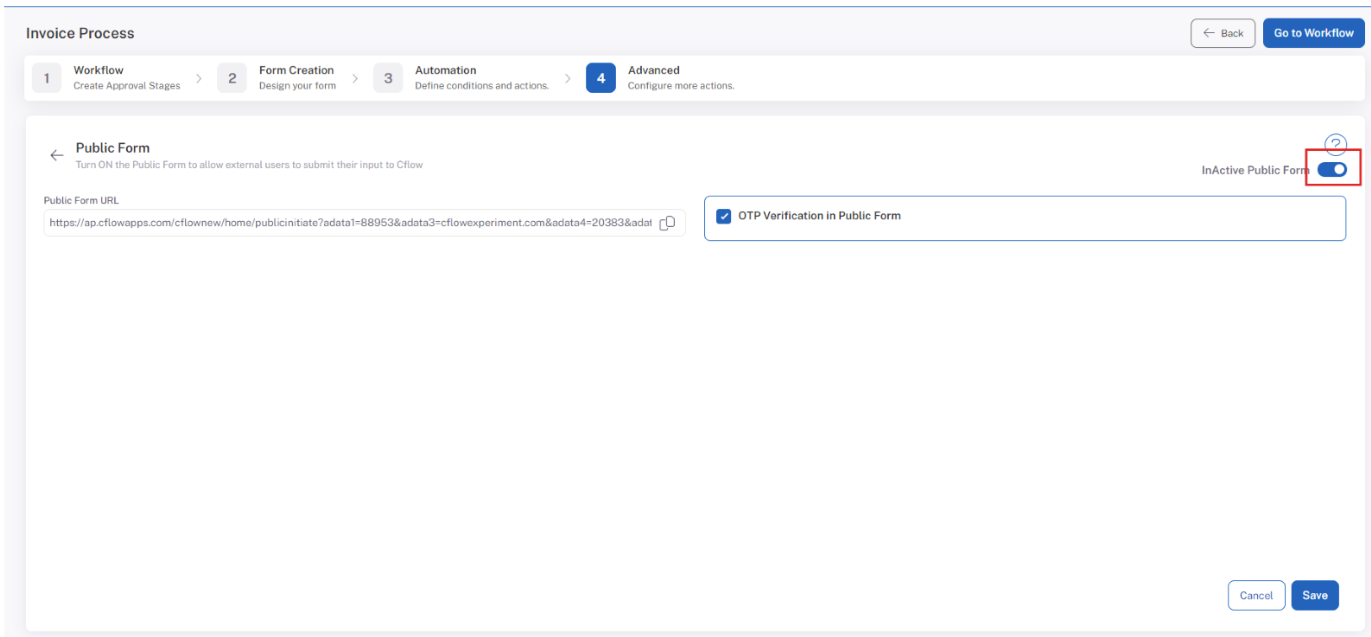
To make use of the public form, turn on the toggle Public Form on the right side. A link to the public form is generated in the Public Form URL field. This link can now be accessed by anyone without logging in to Cflow. The workflow will be initiated and a blank form is shown to the user when a user navigates to this URL. Filling in this form and submitting will send the data to Cflow where the request will be processed and moved to the next stage based on the rules.
Cflow provides an OTP verification in Public Form for additional security. This allows only the authenticated users to access the Cflow request. Turn on the toggle OTP Verification in Public Form.
OTP for Cflow Public Form Submission:
OTP authentication sends an email to the specified email address with a one-time password. You can use this password to authenticate the user.
Follow the steps below to initiate a new request in Cflow using public form URL:
- Click on the public form link that is provided to you.
- Enter your Email ID and click on send OTP.
- Enter the one-time password (OTP) that you have received for Cflow initiation and click on Verify OTP.
- Once the OTP is verified, you can fill in the form and submit it.
Public Form Approval
Here are the Steps to configure approval without login.
1. Enable Public Form:
First, ensure that the public form is enabled by following these steps:
- Click on “Workflow Setup.”
- Choose the desired workflow.
- Click on “Advanced.”
- Select “Public Form” and activate it.
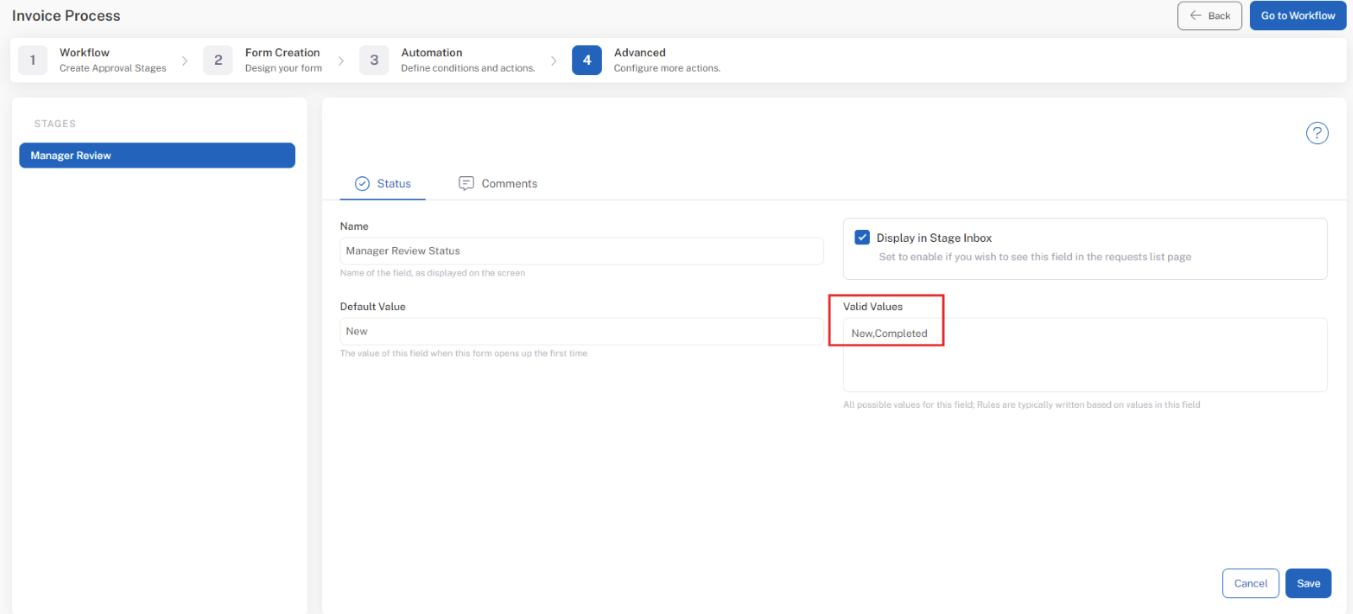
2. Change Approval Fields:
- Navigate to the “Advanced” tab and choose “Approval Fields.”
- Select the specific stage for which you wish to enable approval without login.
- Modify the Valid Values to include “New” and “Completed”
3. Create Approver Email Field:
- Access the Form Creation interface.
- Include an Email field within the form.
- Name the field as Approver Email2, Approver Email3, Approver Email4, and so forth, with the number corresponding to the stage number. The display name can be altered at a later stage.

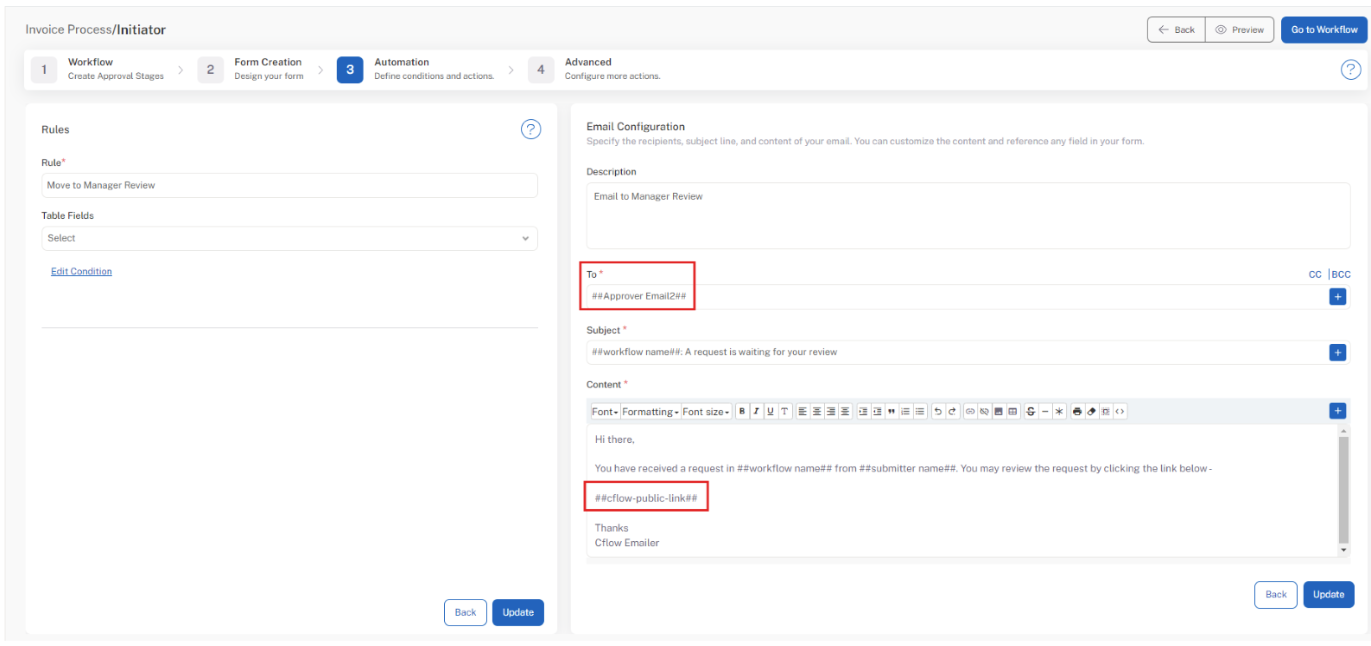
4. Change Email Settings:
- Navigate to Automation.
- Open the Email configuration.
- In the “To” field, include “Approver Email2.”
- Within the email content, insert ##cflow-public-link##.
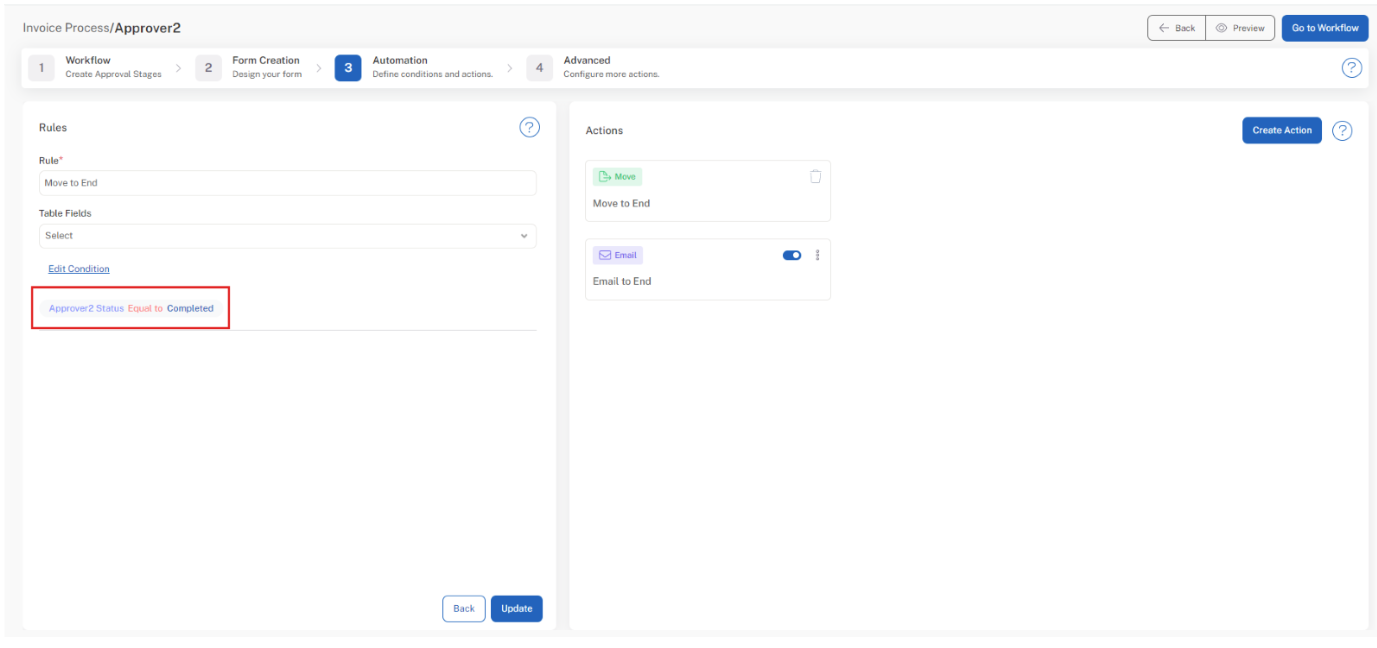
5. Change Rules:
- Go to Automation.
- Choose the stage where approval without login will be implemented.
- Set the rule as “Approver2 Status Equal to Completed.”